- Print
- DarkLight
- PDF
Add a Report to the Print/Export Preview Dropdown
Article summary
Did you find this summary helpful?
Thank you for your feedback
This gives users the ability to easily export/print from within a grant, proposal, web application, or scholarship.
To Add a New Report
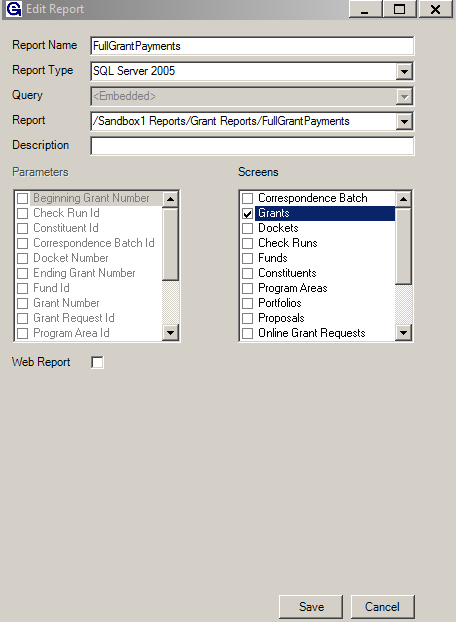
- Click Reports > Register New.
- Enter the Report Name (it can be anything the user wants).
- Select SQL Server 2005 for the Report Type.
- Select the report the user wants from the File Path drop-down.
.png)
- Enter a Description for the report (optional).
- In the Screens section, select the type of record the user wants the report to be associated with.
.png)
- Click Save. The user should now be able to see the new report in the print and preview drop-downs.
To Edit an Existing Report
- Click Reports > Select the report > Click Edit.
- The first section will populate with information.
- Use the Screens section to set which screens the user would like to see this report populate.
- Save.

Was this article helpful?


.png)
.png)

