Adding a Committee
- 06 Oct 2023
- Contributors

- Print
- DarkLight
- PDF
Adding a Committee
- Updated on 06 Oct 2023
- Contributors
- Print
- DarkLight
- PDF
Article summary
Did you find this summary helpful?
Thank you for your feedback
What is a Committee?
Review Committees are developed to streamline the process of reviewing applications. A Committee is a group of reviewers assigned to evaluate and score the same applications. A Committee must be established in order for reviewers to see their assigned applications for review.
Setting up the Committee:
- Click Reviews > Committees.
- Click +New Committee.
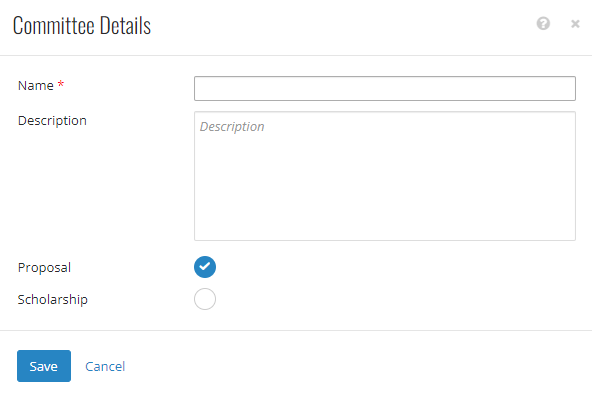
- In the new window, Name the committee.
- Add an optional description to explain the purpose of this committee.
- Select the Committee Type (Proposal or Scholarship).
- Click +Member to add committee members. Potential committee members will populate based on constituent codes on the constituent record, approved web users with Committee rights will display. Select the committee members by marking the box next to their name.
- Click Accept.
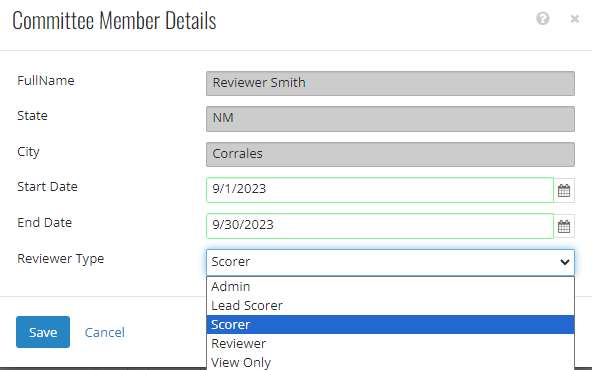
- For each reviewer, use the ellipses next to their name to:
- Add an optional start date.
- Add an optional end date.
- Select reviewer type:
- Admin (internal reviewer) - Has full access to all phases of the review process.
- Lead Scorer (a person outside of the committee who needs to see the progress of the committee).
- Scorer - Can score an application but does not have access to other’s scores.
- Reviewer - Can view applications and leave comments but cannot score an application.
- View Only - Can only view application. Cannot score or see other’s scores.
- Save.


Setting up the Application Group:
After the committee is established, applications can be grouped in such a way that users and reviewers can access only those applications which fit the selected criteria.
- Click Reviews > App Group.
- Click +New Application Review Group.
- In the new window, fill in Group Name.
- Add a description such as year or grant period.
- Select Application Type (Proposal or Scholarship).
- Select the appropriate Application that your committee will be reviewing in the Web App field.
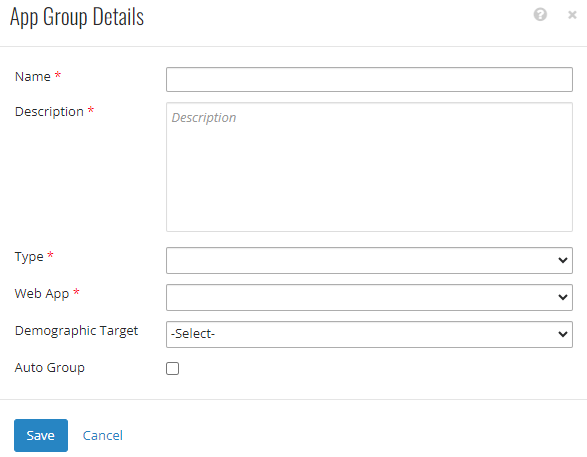
- Optional: On the Criteria Tile, users can define the Profile field from which to draw the specific applications.
- Add Applications to this group by clicking +Add Application.
- Select specific applications by marking the box next to the application. The applications chosen in this section will be available to the defined Review Committee for their review and scoring. Note: applications in the Created status will populate here but not show on the portal until officially submitted. Denying Created applications will remove them from the available list.
- Click Accept to add the applications to this group.


Reviews tile is where the user will see the applications as they are being reviewed and the scoring for each reviewer. For example, if there are four reviewers, each application will have four reviews, here the user can see what each reviewer has scored as an Admin Role.

Attaching the Review Committee and Reviewers to the Application:
The Scoring tile allows user to set up the scoring of applications, if applicable. Scoring takes place over one to three rounds. Simply enable Round number and set the parameters for scoring.
- Click Online Apps > Online Apps.
- Click Config on the application form want to enable with scoring.
- Scroll down to the Scoring Tile.
- Click The blue + button and use the drop-down menu to select the Application Review Group just created and the Application Review Committee just created. The count columns will populate automatically.
- When ready to enable scoring click the pencil icon on Round 1 to check the box to enable round one scoring.
- Select a Scoring Type (Manual – Yes/No is suggested).
- Automatic allows for a non-reviewer scoring to take place after the round has been locked. In an extra-large application cycle, it might be helpful for the first round to be automatic to greatly reduce the number of qualified applicants. (This requires a stored procedure in your Grants database and needs to be setup by NPact.)
- Manual –Yes/No In addition to the ability to score individual fields, this selection allows reviewers to choose yes, no or maybe if they wish the application to move on to the next level
- Manual –Score allows users to set a range of scores that reviewers can choose from for a ranking style of scoring.

- If the application is Open-Ended a reviewer and committee can review applications at any time.
- If the application is Cyclical, reviewers must wait until the application is closed before scoring. After the application is closed, the application MUST BE LOCKED TO SCORE SUBMITTED APPLICATIONS. Locking a scoring round prevents other applications being submitted.
- In the screen pictured above, on the Score Process tab, Click the blue Lock link to link this round.
- Toggle to lock the application. When locked, applications can no longer be submitted. Any applications that were created but not submitted will be marked Expired. Rounds must be locked to enable reviewing/scoring on cyclical applications. Open ended applications should not be locked.
See this document for instructions in Foundation Cloud Community Portal.
Was this article helpful?
