Applying Workflows
- 03 Dec 2021
- Contributors

- Print
- DarkLight
- PDF
Applying Workflows
- Updated on 03 Dec 2021
- Contributors
- Print
- DarkLight
- PDF
Article summary
Did you find this summary helpful?
Thank you for your feedback
The concept for applying workflows is fairly straightforward. A default workflow template is applied when creating a record, based on Record Category and Type. For example, when a proposal is added to the system, a proposal type is selected. If the proposal type has been configured to have a default workflow type in Config > Business Rules > Proposal Type tab, the workflow template will then default on the proposal. This defaulting also holds true for grants based on grant type, but is not true for scholarship application.
The following sections provide further details on using workflows within Grant Edge (GE).
Main Workflow Screen
Workflow templates work the same no matter what the record type is.
The workflow template is determined by the record type. In the example shown, the proposal is a Standard proposal and therefore the workflow is set to a New Standard Proposal Workflow template.
- When setting up a workflow template, it is assigned to specific types of record (scholarships, proposals, grants, etc.) and record type (standard proposals, expedited proposals, donor advised grants type A, donor advised grants type C, etc.).
- A template is established, but can have steps added and removed as necessary.

Adding a New Workflow Step:
- To add a step, click the Add Step link and a Workflow Item screen is displayed.
- The step number sequences the task in the workflow. Manually enter the Step Number based on where it should be sequentially. If the new step needs to precede an existing step, enter the correct number for the new step. The existing steps that follow the new step will need to be opened by double-clicking on each step and renumbered so the steps stay in sequential order.
- To select a task, a drop-down list provides a complete list of tasks associated with the specific record type (proposals, scholarships, etc.).
- After selecting the Task, select the Due Date and the person the task will be assigned to. By default, the system will assign the task to the user creating the step and set the due date to the current date.

Workflow Step Completion:
The Workflow tab of a record displays the main step details. However, when the step is complete, the Workflow Item Step Details tab is used to enter the completion information. Several fields need to be completed on the Step Details tab.

- Enter the date the task was completed in the Date Completed field.
- Select the user that completed the task.
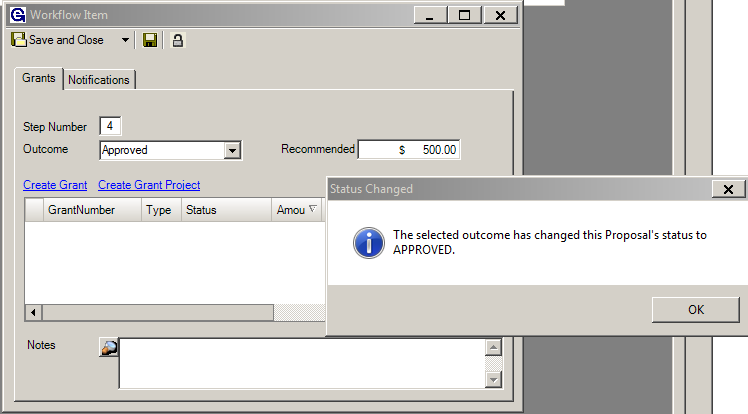
- The Outcome field is selected from a drop-down list which contains standard outcomes such as Approved, Completed, Unfinished, Ongoing, etc. The list of possible outcomes, for a step, is defined within the workflow template. Since this is a proposal workflow template, selecting the Approved Outcome will also change the proposal status. A message will be displayed similar to the one shown below

For an Approval, a new Step Amount must be entered. The Step Amount can start out as the Requested Amount if this is configured in Config > Global Settings and the Default Workflow Step Amounts item is set to True. The Approved Amount could potentially change through each workflow step. In the example being used, there are only two steps to the workflow so the Step Amount will become the Recommended Amount.
A Reason can be selected for any outcome from the pre-defined drop-down list. One of the predefined reasons is See Notes which allows a more extensive reason to be entered within the Notes field.
The Action field is another field selected from a drop-down list. The actions can be Alert, Notify, Email, etc. For each action, there is a corresponding drop-down list of destination users. For instance, Email can be selected along with a user to whom an email should be sent.
*Note: GE does not actually send the E-mail. That is performed outside the GE system.
*Note: If a task has a prerequisite task set up, the prerequisite task must be completed with the fields completely filled in. Just changing the Outcome is insufficient and GE will not allow the task with the prerequisite to be complete. This is also true if a grant’s payment is contingent on the completion of a workflow task.
Due Diligence:
Specific workflow tasks can be designated as Diligence tasks. For a due diligence step, the Due Diligence tab will have items that are required to be completed.

The first part of the due diligence process is addressing due diligence items. These are setup under Config > Profiles > Grant Workflow Diligence. There is a due diligence profile area for each record type (Grant, Proposal and Scholarship Application). During configuration, a sequence of items, both mandatory and discretionary, and field types, which can be Yes/No, Text, Numeric, etc., are set up.
*Note: To be able to add Diligence Profile to the tab and leave the values blank, the Diligence Profile must be set to Required. If a user does not want them to be required, a value such as TBD can be added as the Value and this will hold the item in place.
Depending on the due diligence, when a task has been completed, a drop-down list will display possible answers in the Value field.
Create Grants:
At some point during the workflow processing, specifically for Proposals and Scholarships, the application is approved and needs to be converted to a Grant. Prior to running the Create Grants step, a Fund and a budget amount for the fund must be entered on the Fund Allocation tab of the record.
- Create Grant process is accomplished by entering an Outcome. The Status should be set up to become the final status of a proposal or a scholarship application. A status message will be displayed.
- Select Create Grant or Create Project Grant, click on the appropriate link to allow for further definition of the data to be used in the resulting Grant.
- Create Grants > Details > Select the default characteristics to be used by clicking the appropriate check box. Also enter the number of payments that will be made for the Grant (the system defaults this field to 1).

- Click the Generate button. The grant will be created and will open on the grant. If Default Proposal Grant Type has been configured in Global Settings to use a specific Grant Type, this will be reflected in the Grant Number. If multiple payments have been set on the Create Grants workflow, the system will create a payment row for each payment on the Payment tab of the grant. The Schedule Wizard on the grant’s Payment tab will need to be used to actually create the payment amounts for each row. The Proposal Short Name will default into the Check Designation field on the grant.


Was this article helpful?
