Create A New Workflow Template
- 12 Jul 2022
- Contributors

- Print
- DarkLight
- PDF
Create A New Workflow Template
- Updated on 12 Jul 2022
- Contributors
- Print
- DarkLight
- PDF
Article summary
Did you find this summary helpful?
Thank you for your feedback
1. Go to Config > Workflow > New Template.
There is a three step process to creating a new workflow template:
1. Components:
- Add all the components that are necessary for a workflow template to be complete by adding and/or verifying that the Tasks, Outcomes and Statuses are set up.
- Adding Tasks - The first thing to do is to add the tasks that are needed for a workflow template. To add a task, go to the last blank row in the Tasks window and enter a task name (Grant Agreement Received) and a task description (not required). The Active box must be checked for this task to be available to use in a template. A workflow task can also be used for Diligence and Create Grant, but not both.
 *Note: The system will automatically put the new workflow task in alphabetical order when the user clicks on another field. This makes it appear as if the field has disappeared when it has not.
c. Adding Workflow Outcomes - The Outcomes available on the Components tab should be reviewed to make sure that the outcomes are available. An outcome of Denied has been added. Again this is added by going to the bottom blank line and entering the Outcome name and clicking the Active box. By default, the Outcome will be available for Grant, Proposal and Scholarship workflow tasks.

d. Adding Workflow Statuses - The Statuses available on the Components tab should be reviewed to make sure that the required statuses are available. These statuses will update the status of a proposal or scholarship application as workflow tasks are completed. A status of Denied has been added. Again, this is added by going to the bottom blank line and entering the status name and clicking the Active box. The Proposals and/or Scholarship boxes should be checked if the status is going to be used on those record types. It is NEVER recommended to have your own custom statuses. It’s always best to use the ones out of the box as listed in the first screen shot.

Once all the components needed for a workflow template are available, the next step is to configure the tasks on the Task tab.
2. Configuring Workflow Tasks:
The next step in creating a workflow template is to configure the individual tasks with status and outcomes. Tasks can be added to three different tabs – Grants, Proposals and Scholarship Applications.
- To add a new task to a tab, go to the blank bottom row and select the task from the drop-down list of available tasks. Only the tasks that are not already apart of the task list for that tab will be listed as available.
- Once the task is selected, click the Active box. On the right side of the screen select the available Outcomes and Statuses for that step from the drop-down list. Do not repeat Outcomes with different status as this will lock the Workflow task.
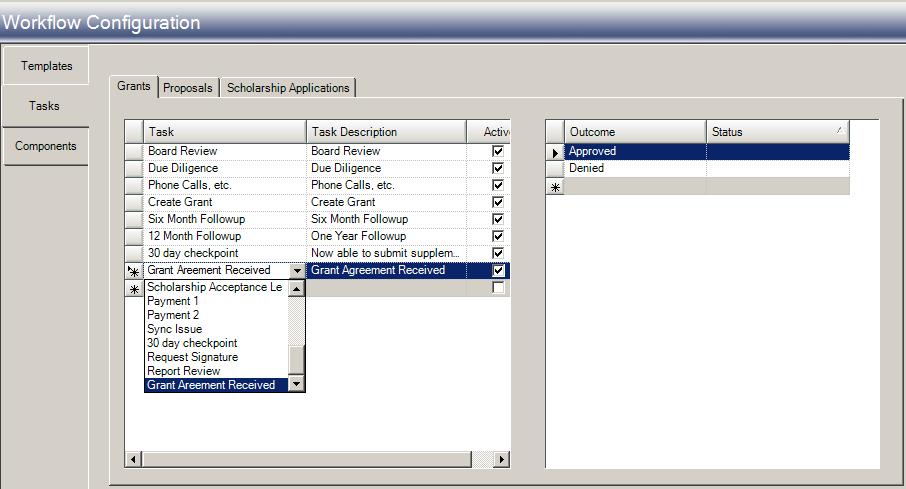 *Note: Because the example being shown above is for a Grant Workflow task, even though the Status column is shown, a Status cannot be selected. Workflow tasks cannot change the status of a grant.

3. Building a Workflow Template:
- Now that the workflow components and tasks are completed, the third step is to build the actual templates. The templates are built on the Templates tab of the Workflow Configuration function. To build a template, click the Templates tab and then the New Template link circled below.
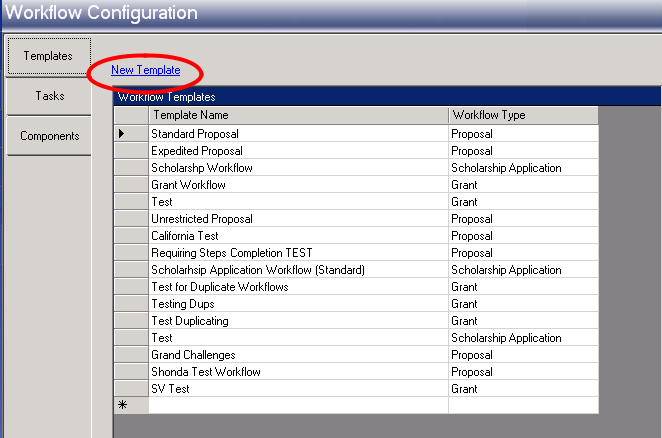
- When the New Template link is clicked, a window similar to the one below will be displayed.
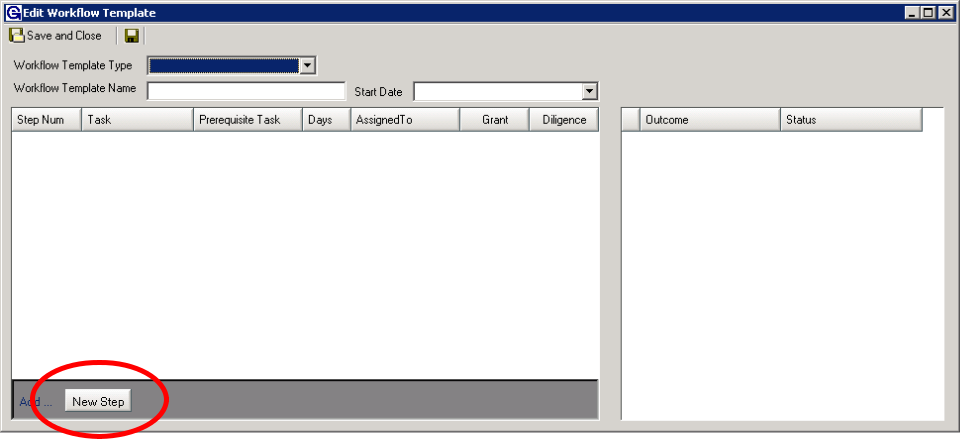
- From the drop-down list for the Workflow Template Type field, select the type of record (grant, proposal or scholarship application) the workflow template will used with. Enter an identifying name in the Workflow Template Name. The Start Date currently defaults to Received Date, but other dates may be added in the future. The Start Date is used to calculate when tasks are due.
- To add a workflow task, click the New Step button circled above. A blank line will be inserted in the grid on the left side of the screen as shown below.


Notice that the Step Num field defaults to 0 (zero) and the AssignedTo field also defaults to 0 (zero).
The first task can be selected from the drop-down list as shown below.

Building Workflow Templates – Selecting a New Task:
Select the first Task needed. Change the Step Num to 1. Since this is the first step, there cannot be a Prerequisite task. Enter the number of Days from the Received Date that this task is due. Select the Grant Edge (GE) User the task is to be assigned to from the drop-down list. The user selected can be a role (i.e., Current User, Record Manager of Program Area Person) or it can be an actual GE user name.

Notice that the Outcome and Statuses created on the Tasks tab are being displayed on the right side of the screen for this task. Also notice that this is a Diligence step. A discussion on Diligence steps is included in Applying Workflows.
Keep repeating the process until all the steps needed are added to the template. Below is an example of a very simple proposal workflow template.

*Note: A Proposal or a Scholarship Application workflow template must have, at a minimum, two workflow tasks.
*Note: For the system to calculate the due dates, each task after the first task must be a prerequisite of the next task.
Was this article helpful?
