- Print
- DarkLight
- PDF
Foundation Cloud Community Portal allows Donors (users registered as the role of Donor) to establish a new fund with the Foundation by completing a simple application process, called a New Fund Request Application. This article outlines the steps for funding a new fund.
Creating a New Fund Request
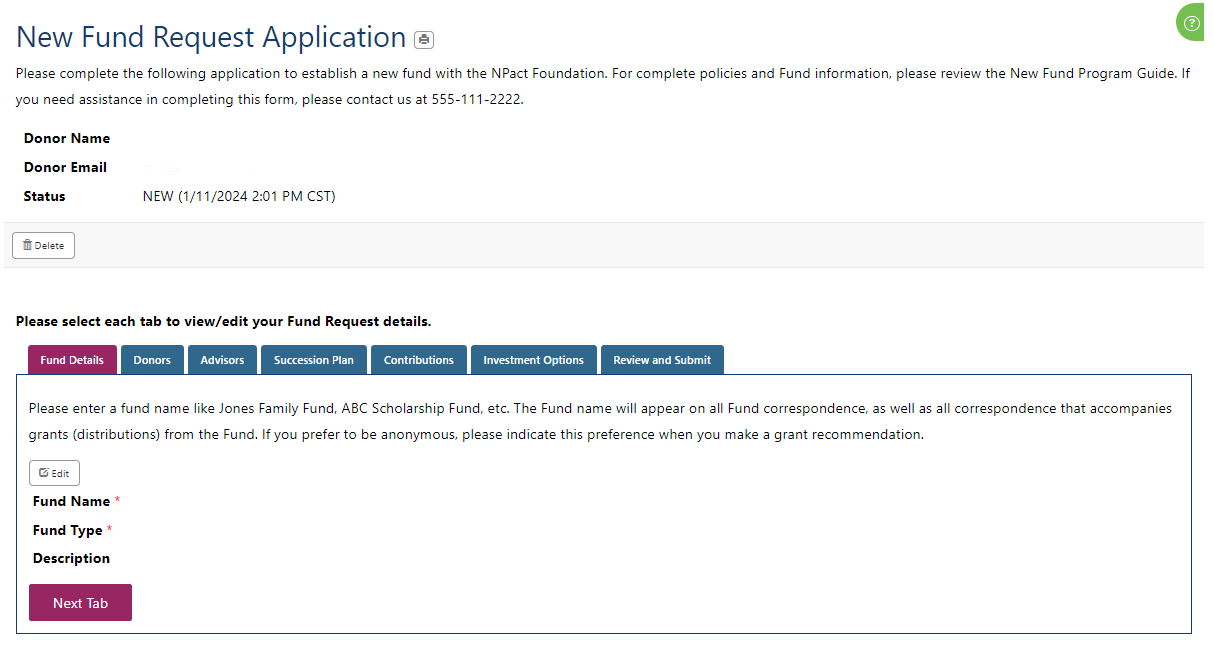
To begin, open Foundation Cloud Community Portal and navigate to Fund Advisor > New Fund Request. The New Fund Request Application screen contains the details of your Fund Request. The top of the screen shows instructions and summary information, including the Donor Name, Donor Email, and Status. If the Fund Request has not yet been submitted, there will be a Delete button after the summary.
The Fund Request Application is split into the following seven (7) tabs. Each field on these tabs which is marked with a red asterisk (*) is required. You will need to fill in the fund name on the fund tab before making any other changes. Each tab has its own instructions and will have its own Edit button if the Fund Request can be edited.
All in-progress Fund Requests Applications will auto-save and can be located by navigating to Fund Advisor > Saved Fund Requests.
Tab 1: Fund Details
This tab contains the general details of the Fund.
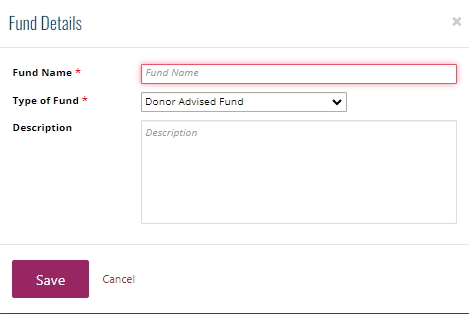
To edit the Fund Details, click Edit.
Create a Fund Name.
Select the Fund Type. The Fund Type options available here vary based on the Foundation. Examples include Donor Advised Fund, Endowment, Designated, etc.
Add a Description of the Fund.
Select Save.
Select Next Tab.
Tab 2: Donors
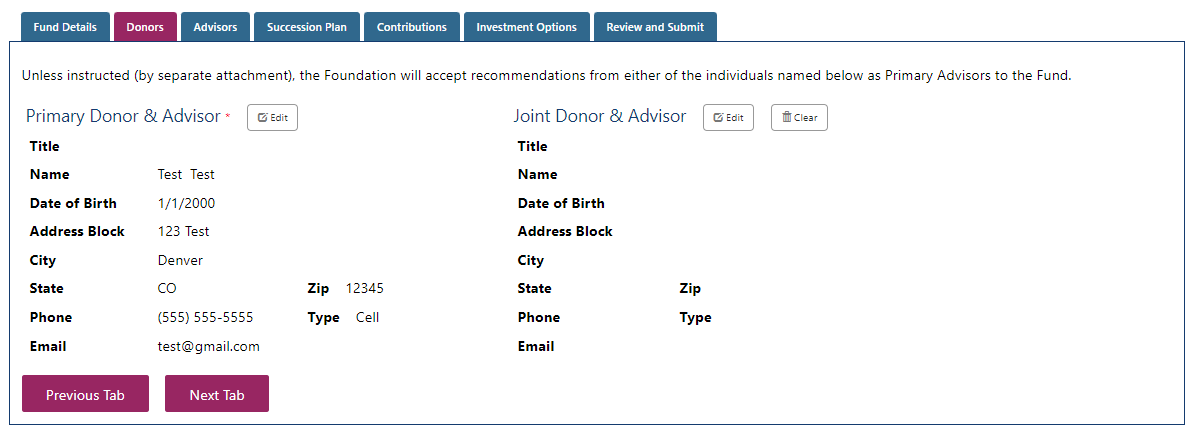
This tab contains the Primary Advisor and the optional Joint Advisor. Unless instructed (by separate attachment), the Foundation will accept recommendations from either of the individuals named below as Primary Advisors to the Fund.
To update the Primary Donor & Advisor details, select the Edit icon.
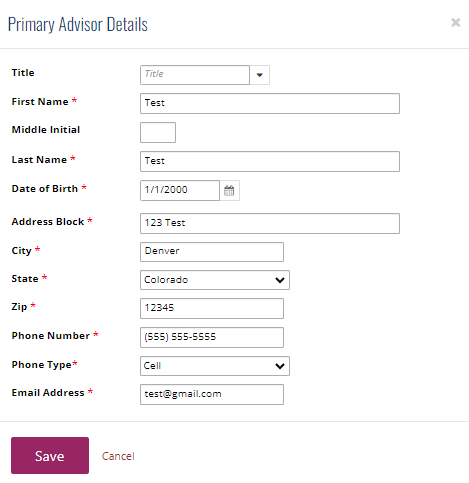
In the Primary Advisor Details window, update the contact information fields: Title (optional), First Name, Middle Initial (optional), Last Name, Date of Birth, Address Block, City, State, Zip, Phone Number, Phone Type, and Email Address.
Select Save.
To update the Joint Donor & Advisor (optional), select the Edit icon.
In the Secondary Advisor Details window, complete the contact information fields: Title (optional), First Name, Middle Initial (optional), Last Name, Date of Birth, Address Block, City, State, Zip, Phone Number, Phone Type, and Email Address.
Note: Requesting a Secondary Advisor does not automatically enable that individual to access the Fund. Access will be granted after Foundation staff complete a confirmation process in Foundation Cloud Grants.
Select Save.
Select Next Tab.
Tab 3: Advisors
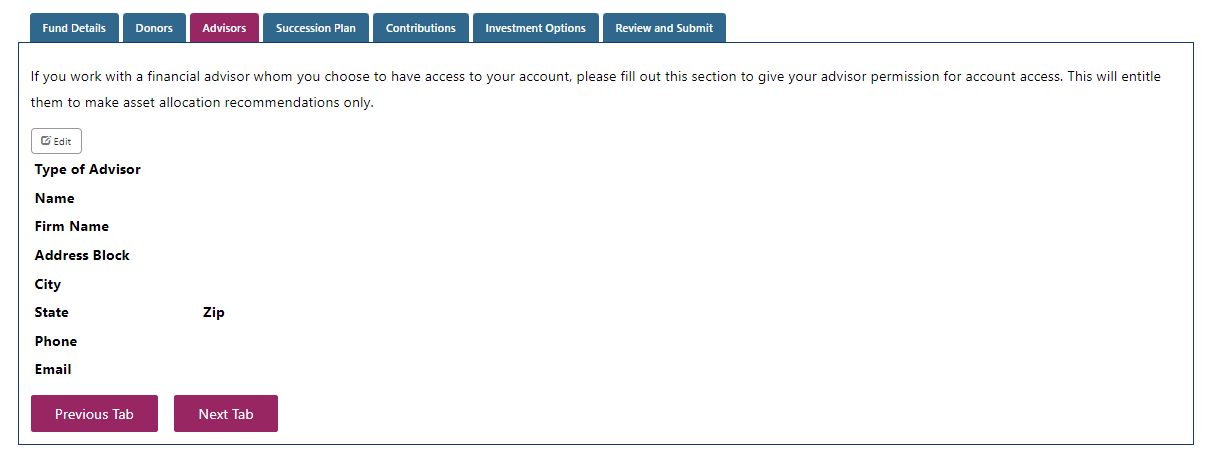
If you work with a financial advisor whom you choose to have access to your account, please fill out this section to give your advisor permission for account access. This will entitle them to make asset allocation recommendations only.
To update the advisor details, select the Edit icon.
In the Financial Advisor Details window, update the contact information fields: Type of Advisor (I.e., Accountant, Attorney, Financial Planner, Investment Manager, Other), First Name, Middle Initial (optional), Last Name, Firm Name, Address Block, City, State, Zip, Phone Number, and Email Address.
Select Save.
Select Next Tab.
Tab 4: Succession Plan
This tab allows the Donor to provide the Foundation with a Succession Plan for the Donor-Advised Fund you establish, in the event of the Donor’s death or incapacity.
There are two options for a Succession Plan:
Successors: Use this option if the fund is to be kept open and managed by someone else.
Beneficiaries: Use this option if the fund is to be closed and its remaining assets distributed to specific charitable organizations.
Take these steps to configure the Succession Plan:
Select Change Plan Type.
In the Recipient Options window, choose Successors or Beneficiaries. Donors can choose up to two (2) Successors or five (5) Beneficiaries.
If Successors are chosen:
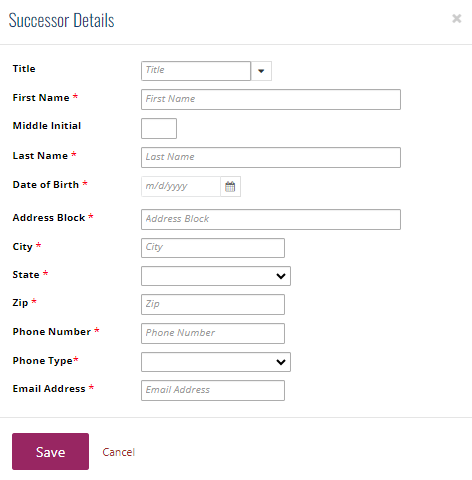
Select Add Successor.
In the Successor Details window, update the contact information fields: Title (optional), First Name, Middle Initial (optional), Last Name, Date of Birth, Address Block, City, State, Zip, Phone Number, Phone Type, and Email Address.
Select Save.
Repeat the above two steps to add a second Successor.
To update the Successor information, select Edit. To delete a Successor, select Remove.
If Beneficiaries are chosen:
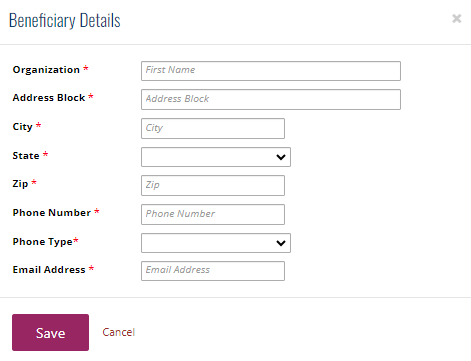
Select Add Beneficiary.
In the Beneficiary Details window, update the contact information fields: Organization, Address Block, City, State, Zip, Phone Number, Phone Type, and Email Address.
Select Save.
Repeat the above two steps to add additional Beneficiaries.
To update the Beneficiary information, select Edit. To delete a Beneficiary, select Remove.
Select Next Tab.

Tab 5: Contributions
This tab contains the details of the initial Contribution that will be made to set up the fund. Please refer to the Foundation for detailed information about contributions, including minimum contribution amount and the types of gifts that can be accepted.
To update the Contribution, select Edit.
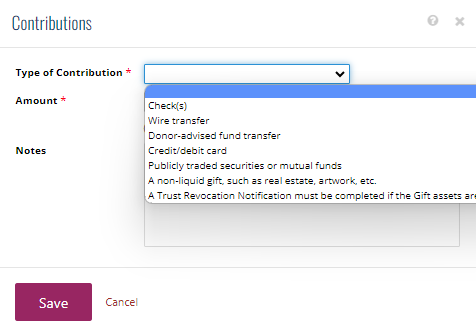
In the Contributions window, select the Type of Contribution:
Check(s)
Wire Transfer - Includes the option to Make a Payment at the time of the Fund Request (not required)
Donor-advised fund transfer
Credit/debit card - Includes the option to Make a Payment at the time of the Fund Request (not required)
Publicly traded securities or mutual funds – Provide the name of the issuer and the number of units that will be contributed
A non-liquid gift such as real estate, art, etc.
A Trust Revocation – Notification must be completed if the Gift assets are titled to a revocable trust
Enter the Amount of the contribution. The Foundation may have a minimum amount that must be contributed. Note: Some of the Contribution Types may not require a dollar amount. If that is the case, the Foundation will contact you to arrange the payment.
Enter any Notes about the Contribution. If an initial contribution is from multiple sources, please include details in the Notes.
Select Save.
Select Next Tab.

Tab 6: Investment Options
This tab contains the investment suggestions for the fund. All investments must add up to 100%. Donors are able to edit their investments here.
To make changes to the fund investments, click Edit Investments.
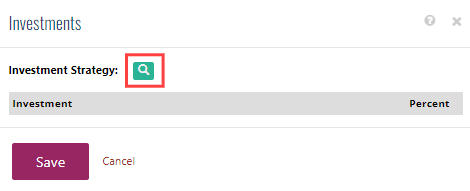
In the Investments window, the donor can select the investments and percentages for the fund's investment portfolio.
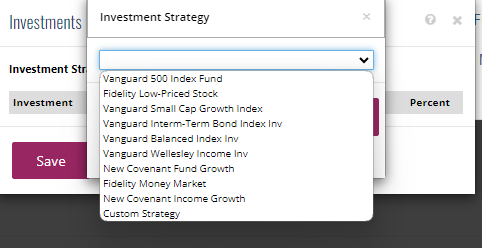
Select the search icon, then select a portfolio from the Investment Strategies list. If the strategy is customizable, you can then add, remove, or edit percentages for individual investments. Once adjustments have been made, select Save.
Select Save.
Select Next Tab.
.png)
Tab 7: Review and Submit
This tab contains the final steps of signing and submitting the fund request.
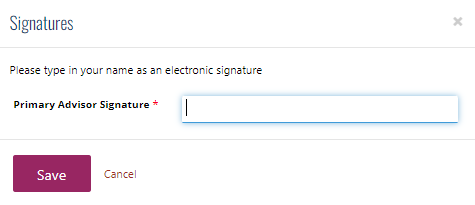
To finalize the Fund Request, review the statement and select Edit. Sign with the appropriate signatures. The Joint Advisor signature is only required if a Joint Advisor has been entered.
Select Submit. Once submitted, the Fund Request cannot be edited. The status will be changed to SUBMITTED. The status date and the signature dates will all be set at that time.

To review all Fund Requests, navigate to Fund Advisor > Saved Fund Requests.


