Processing a Scholarship into a Grant
- 16 Jun 2023
- Contributors

- Print
- DarkLight
- PDF
Processing a Scholarship into a Grant
- Updated on 16 Jun 2023
- Contributors
- Print
- DarkLight
- PDF
Article summary
Did you find this summary helpful?
Thank you for your feedback
Scholarship Record
Scholarship records are created from submitted web applications. To create a Scholarship record from a web application, please see these instructions before completing the following processing. Scholarship records utilize a defined workflow to accomplish diligence tasks and ultimately produce a grant record for payment on a check run.
Scholarship Application
- Ensure the Details tile includes the Student/Applicant, Scholarship Fund, and Institution.
- The Custom Fields tile will display the students' answers to questions on the application.
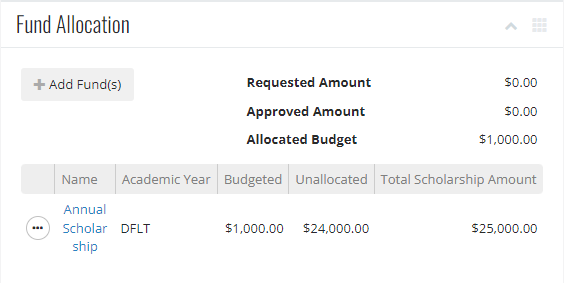
- On the Fund Allocation tile click +Add Fund(s) to set the fund and amount for the scholarship grant that you'd like to create.
- The Workflow tile requires that the user complete at least two steps; a review step before a create grant step. However, the user can have as many steps as necessary per internal workstreams.
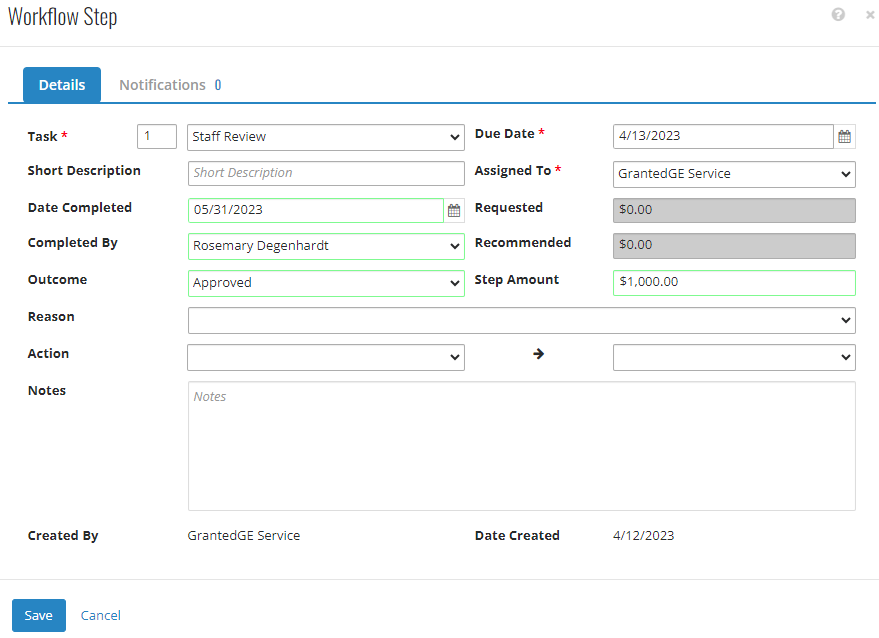
- Use the ellipses next to the task > click Edit.
- To complete the task, the user must enter these fields:
- Date Completed
- Completed By
- Step Amount (this updates the Approved Amount seen in the Fund Allocation above)
- Outcome
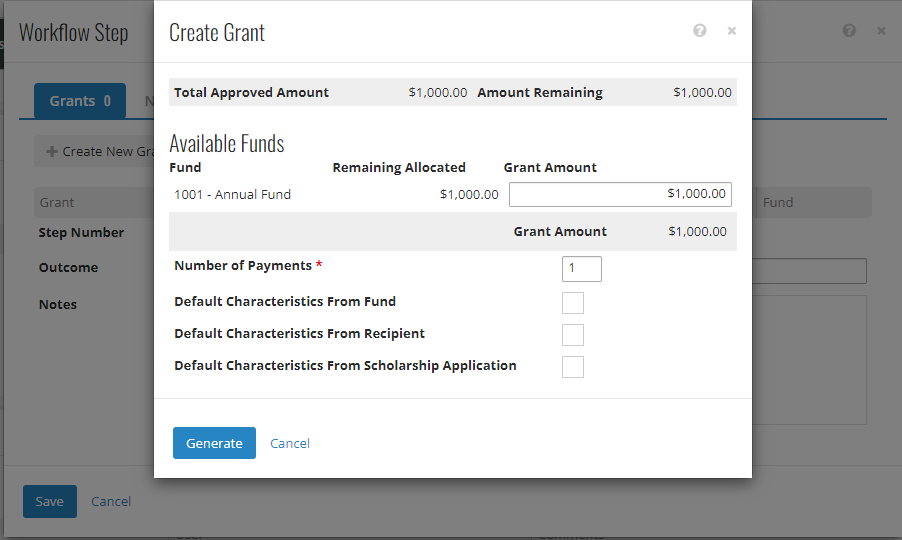
- The Create Grant step will not look the other tasks in the workflow. Open the Task and select +Create New Grant. In the new modal presented below, ensure there is a Total Approved Amount and an amount allocated from the fund.
- Indicate if multiple payments will be used on the new grant record
- Select which, if any, characteristics the user would like to see on the grant record
- Click Generate
- A successful toast message will show on the bottom right-hand corner of the screen.

- After completing both the review and create grant steps, the user can find a link to the grant record at the top of the page under Grants Issued.


Scholarship Grant
Process the scholarship grant just like you would other grant records. Ensure all information is filled out correctly.
- Make sure the College/University is the right one in the Payee area.
- Go to the Payment tile.
- Add payments if necessary.
- This grant is ready to be put on a check run for processing.

Was this article helpful?
