- Print
- DarkLight
- PDF
Article summary
Did you find this summary helpful?
Thank you for your feedback
Follow these steps to make application profiles available for GE queries:
- In GE, go to Admin -> Report Setup Utility.
- Read the disclaimer, and select Yes (we’ll only be working with the “…structures for Profiles…” part).
- Choose Report Profiles from the Control Panel list.
- The list of fields that appear belong to Hunger Proposal Page 1 as noted in the Report Type field.

- Use the Report Type drop down and select <New>

- When you select <New>, it may take a few seconds for the next window to appear, and also keep a lookout for it to appear in the background. If it seems like the system has locked up, then look for this window in the background.
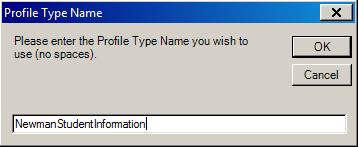
- Add a name for this bundle of pages / fields. This will become an expandable list in query.

- Keep in mind that this will be the way you identify which profiles belong to which application pages, so it would be best practice to use the name application name with NO spaces. Ex: 2022 Community Grant.
- Below is a screen snip from Config section of the web application. It will be helpful to have a list of the page names later in the process.

- Below is a screen snip from Config section of the web application. It will be helpful to have a list of the page names later in the process.
- Click OK, and you should see the new page name in the Report Type box.
- Click “Add all fields from page” next to the Report Type drop down to get to the Add a Page dialog.
- Select Web application or Scholarship Web Application for the Profile Type, then one of the application pages as the Page (reference the screen snip of page names from step 8a).
- Click Add Page to get all the profile fields added.
- Edit directly in the Field Name column as needed.

Note some rules about the names in the Field Names column:
- Cannot begin with a number - if needed, add an arbitrary letter to the beginning of the field. Ex: 501C(3) becomes: x501C3.
- Second character and beyond can only be numbers or letters.
- No spaces or special characters.
- No duplicate field names - change one duplicate name by adding a number. Ex: OrgName1
- Keep the name relatively short (e.g. 20-25 characters; long names can cause problems with the query).
13) Click the Create Query button in the top right of the screen.
14) Select “Yes” to create the new query. Notice that this same process can be used to update an existing query.
15) Select “OK” to acknowledge the new query has been created.
16) Now go to the Query section in GE and select New Query.
17) Select WebApplications as the Focus area on the Info tab.
18) Now go to the Fields tab, and you should see the new group. The fields can be used just as any other field in the query section:

Was this article helpful?


