Creating a Checking Account Record
- 21 May 2024
- Contributors

- Print
- DarkLight
- PDF
Creating a Checking Account Record
- Updated on 21 May 2024
- Contributors
- Print
- DarkLight
- PDF
Article summary
Did you find this summary helpful?
Thank you for your feedback
Creating a Checking Account Record
- In the Accounts Payable module, click the Reconciliation supertab, and then click the Account tab.
- Click the New button on the toolbar.
Account Tab (New Account)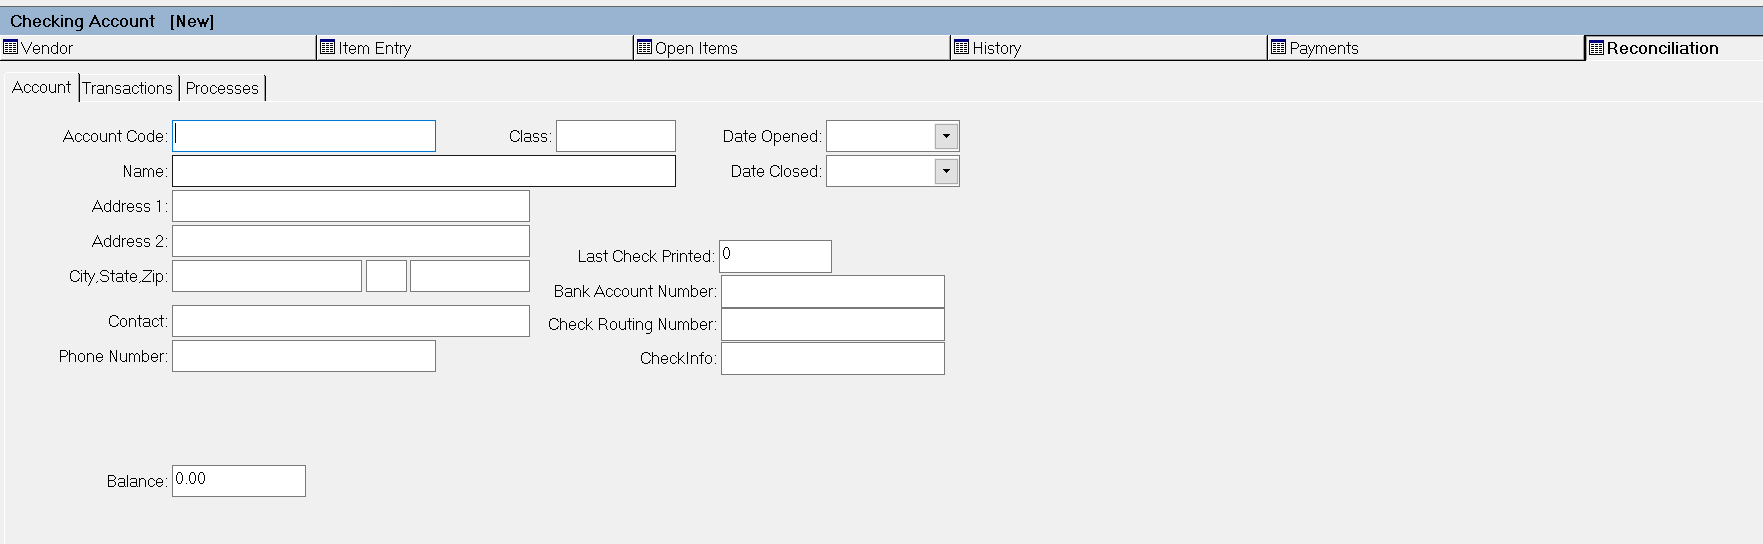
- In the Account Code field, enter the natural General Ledger account number for the new account.
- In the Class field, enter the investment class code for the account (for example, check).
- Enter a Name for the new account.
- (Optional) In the Address, Contact, and Phone Number fields, enter the mailing address and contact information for the contact person at the bank.
- (Optional) In the Date Opened field, enter the date when the account was opened at the bank.
- Enter the Bank Account Number that identifies the account at the bank (rather than in General Ledger).
- In the Last Check Printed field, enter the number of the last check that you printed from the account. FIMS will automatically update this number (which is also used to populate the Next Check Number field when you print checks) each time you print checks.
- (Optional) If you print on blank check stock, enter the bank’s Routing Number.
- (Optional) If you print on blank check stock, enter the Check Info that you want to appear on the check.
- In the Balance field, enter the beginning bank balance for the account (the amount that was used to open the account).
- Click the Save button on the toolbar.

Was this article helpful?
