- Print
- DarkLight
- PDF
Creating a June 30 Fiscal Year Fund Statement
Creating a June 30 Fiscal Year Fund Statement
The steps below show how to create a Fiscal Year statement for a calendar year using the Fund Statement Designer.
1. Start with a statement record that uses an existing row format that you would like to use in the fiscal year statement version. In this sample the FSD Sample 3 was selected..jpg)
2. Hover over the GL: Year to Date column and right-click to select Edit Column. Edit the Heading to say Jul to Dec
- Type should be GL
- Select Actual
- Select Current
- Fiscal Year Relative to Base Year should be -1
- Select Absolute and enter 7 as Period From and 12 as the Through Period.
- Check the box to Hide the column
.jpg)
3. Hover over the Jul to Dec column and right click to select Insert Column After. This step creates the next column to be used by the statement. Hover over that column and right-click to select Edit Column.
- Edit the Heading to read Jan to June.
- Type should be GL.
- Select Actual.
- Select Current.
- Fiscal Year Relative to Base Year should be 0.
- Select Absolute and enter 1 as Period From and 6 as the Through Period.
- Check the box to Hide the column.
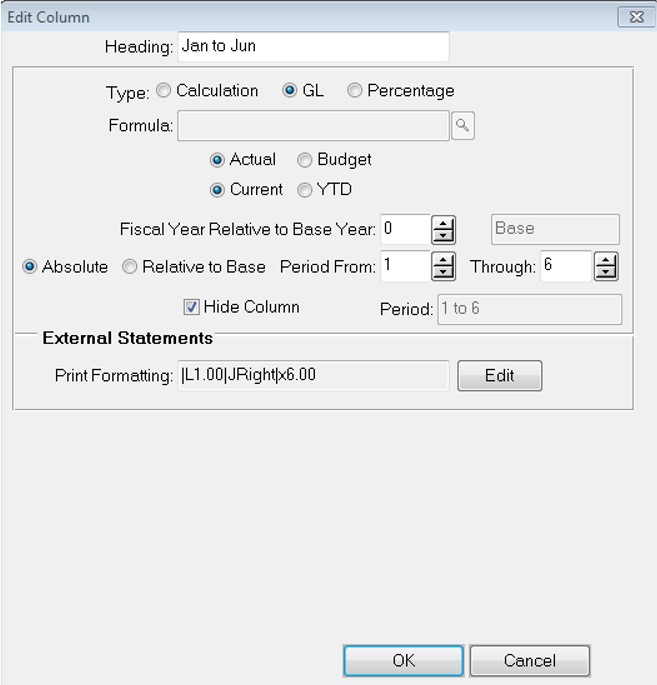
4. Hover over the Jan to Jun column and right click to select Insert Column After. This step creates the next column to be used by the statement. Hover over that column and right click to select Edit Column.
- Edit the Heading to read YTD or whatever you would like the column header to read.
- Type should be Calculation.
- Formula should be set as A+B as shown below.
- Make sure that Hide Column is unchecked.
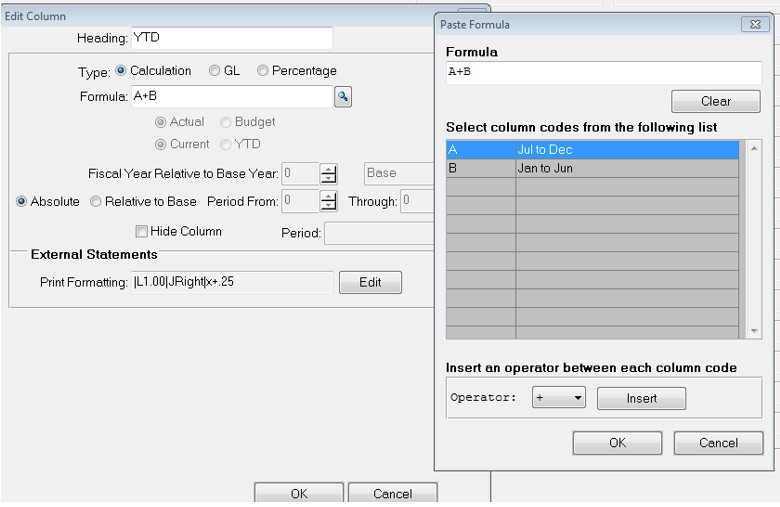
5. Right click over the Beginning Fund Balance row to select Edit Row.
- Format code should be FBB
- Select Print Column A
- Debit Balance
- Select range of Fund Balances. For example for a 3 fund balance set up, for the total of all 3 fund balances, select From 1 through 3
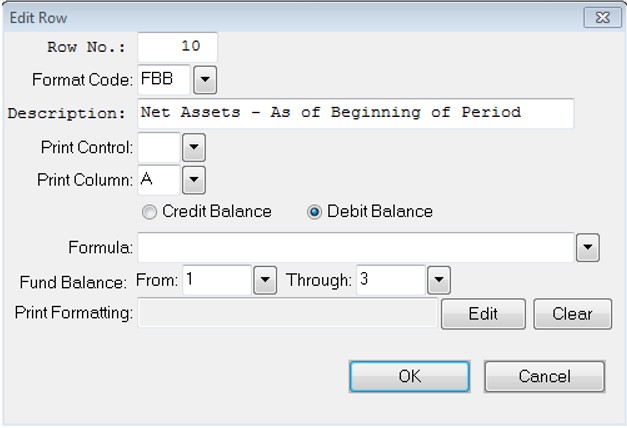
6. For all rows for revenues and expenses or that fall between the beginning and ending fund balance, make sure that the Print Column field is blank.
7. Right click over the Ending Fund Balance row to select Edit Row.
- Format code should be FBE
- Select Print Column B
- Debit Balance
- Select range of Fund Balances. For example for a 3 fund balance set up, for the total of all 3 fund balances, select From 1 through 3
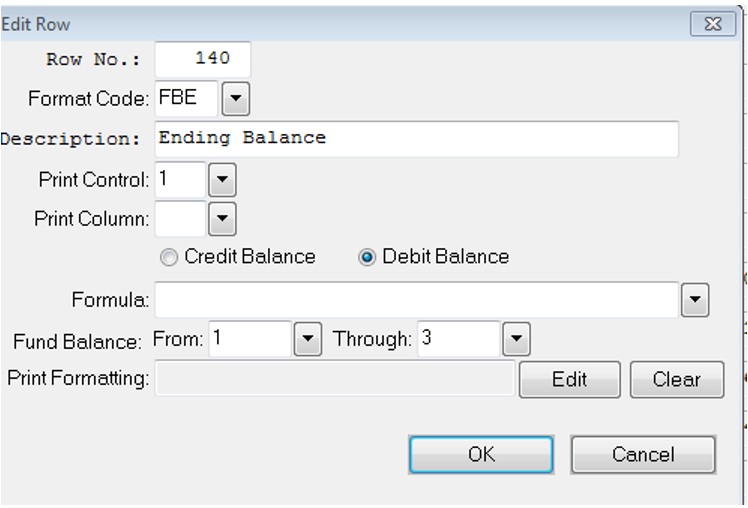
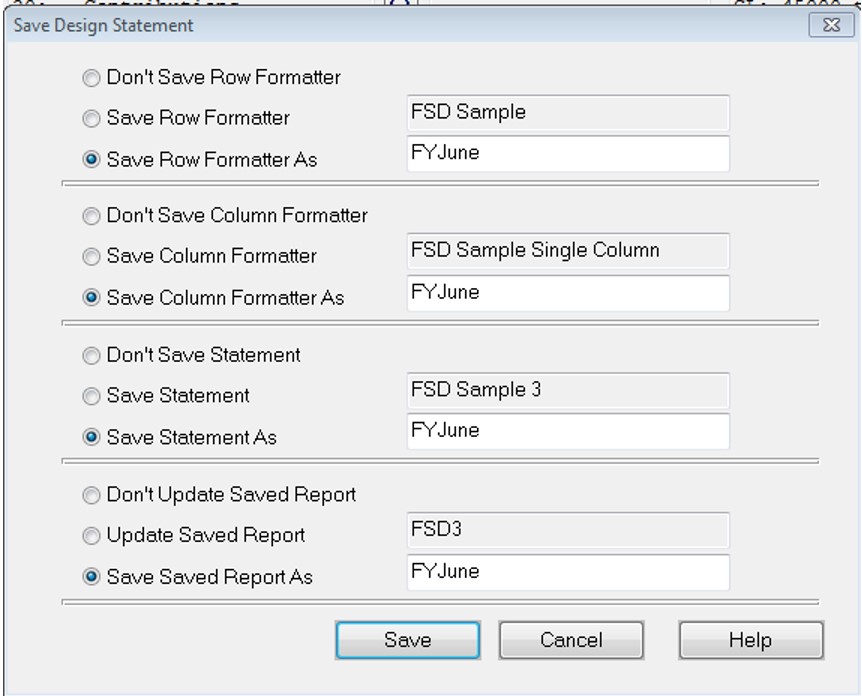
8. Select Save Design Statement and make sure the following options are selected:
- Save the Row Formatter As
- Save Column Formatter As
- Save Statement As
- Save Saved Report AsUse a different name such as ‘FYJune’ so that any statements previously using those row and column formats will not be impacted.
- Click Save.
9. In the Saved Report Settings Used for Preview section, select the Prompt radio button and then click Preview.
10. If you are including Gift and Grant details, make sure that you select the appropriate range of Print Detail From and Through Dates on the Options tab.
11. Select Run Report to view the results.


.jpg)


