How can I prevent a Blank Line from showing in Fund Statement Designer for Fields that have no Data?
- 18 Jan 2023
- Contributors

- Print
- DarkLight
- PDF
How can I prevent a Blank Line from showing in Fund Statement Designer for Fields that have no Data?
- Updated on 18 Jan 2023
- Contributors
- Print
- DarkLight
- PDF
Article summary
Did you find this summary helpful?
Thank you for your feedback
In Fund Statement Designer, some data fields such as address 2 may not have data in them for a profile and when I run a statement in Fund Statement Designer a bank line shows, how can I not show that blank line?
Answer:
Fields with no data are always suppressed but if you are defining an exact X and Y position for the line after the line in question, then the next line will always print in the exact position that you tell it to and thus there will be a blank line above for the line in question where there is no data.
To fix that you must make each line relative to each other rather than setting specific X and Y positions.
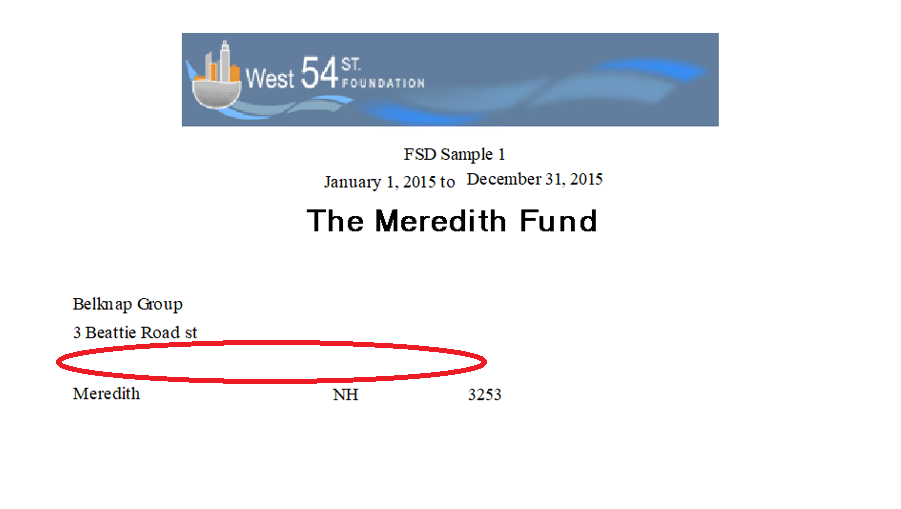
Here is an example Fund Statement Designer statement with some profile fields:![]()
Each field should be positioned relative to the one above it. You would want positioning to be relative to the field above or next to it for all fields, except for the first one of a group.
For the first field of the example, first name, we will use an X and Y coordinate so that it always prints in the same location:![]()
For Last Name, we specify an X position but not a Y position. Instead we make Last Name relative to first name and we do not check the checkbox for Next Line because we want first and last name to be on the same line for this exercise.
![]() For Org name, we specify an X position but not a Y. Instead, we make Org Name relative to last name and we check the checkbox for Next Line because we want org name to be on the next line when it prints.
For Org name, we specify an X position but not a Y. Instead, we make Org Name relative to last name and we check the checkbox for Next Line because we want org name to be on the next line when it prints.![]()
For address 1, we specify an X position but not a Y. Instead, we make address 1 relative to org name, and we check the checkbox for Next Line because we want address 1 to be on the next line when it prints.![]()
For address 2, we specify an X position but not a Y. Instead, we make address 2 relative to address 1 and we check the checkbox for Next Line because we want address 2 to be on the next line when it prints.![]()
For City, we specify an X position but not a Y. Instead, we make city relative to address 2 and we check the checkbox for Next Line because we want city to be on the next line when it prints.![]()
For State, we specify an X position but not a Y. Instead, we make State relative to city and we do not check the checkbox for Next Line because we want state to be on the same line as City when it prints.![]() For Zip, we specify an X position but not a Y. Instead, we make Zip relative to State and we do not check the checkbox for Next Line because we want Zip to be on the same line as State when it prints.
For Zip, we specify an X position but not a Y. Instead, we make Zip relative to State and we do not check the checkbox for Next Line because we want Zip to be on the same line as State when it prints.
![]()
Was this article helpful?
