How to add Header Coding as a Merge Field in Microsoft Word Templates
- 17 Jan 2023
- Contributors

- Print
- DarkLight
- PDF
How to add Header Coding as a Merge Field in Microsoft Word Templates
- Updated on 17 Jan 2023
- Contributors
- Print
- DarkLight
- PDF
Article summary
Did you find this summary helpful?
Thank you for your feedback
Many times, when you copy and paste header coding for a letter that you will merge in Microsoft Word, it does not actually get added as a merge field after toggling ALT F9. These instructions will show how to do that.
Answer:
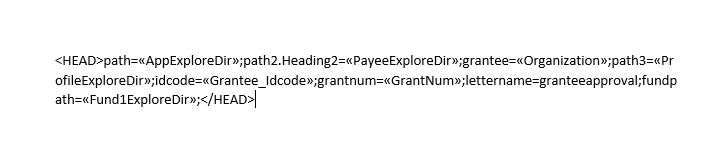
For example, let's say you copy the header coding into your Word template for a grant letter:
If you hit the ALT key and then the F9 key on your keyboard, you notice that it does not change to merge fields. Every field should show as a merge field as shown below:

If the fields do not show as merge fields when toggling ALT F9 you will need to add them as merge fields and then save your template. After you save the template, it will be correct going forward.
To change the fields to merge fields you would do the following for each field:
1. Make sure that your merge template is linked to the main data source; app.txt for grant letters, gift.txt for gift letters, fndstat.txt for fund statements by going to Mailings > Select Recipients > Use an existing list and choosing the correct file for your document type.
2. Take your mouse and click directly to the right of the field right after the parenthesis after the field name:

3. Delete the field all of the way back to the = sign:
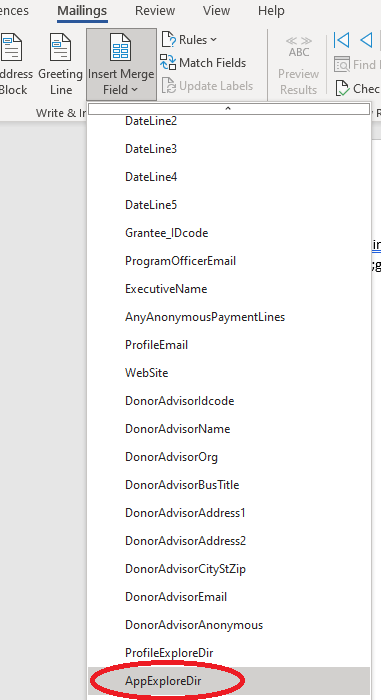
 4. Go to Insert Merge Field, find the merge field you need to add and select it. Be sure that you are selecting the correct merge field. In this example AppExploreDir is being chosen because that is the field was deleted above in the step #3 example.
5. You will now see your field added as a merge field when toggling ALT F9.
Do the same for all fields remaining and then save document.


If you hit the ALT key and then the F9 key on your keyboard, you notice that it does not change to merge fields. Every field should show as a merge field as shown below:

If the fields do not show as merge fields when toggling ALT F9 you will need to add them as merge fields and then save your template. After you save the template, it will be correct going forward.
To change the fields to merge fields you would do the following for each field:
1. Make sure that your merge template is linked to the main data source; app.txt for grant letters, gift.txt for gift letters, fndstat.txt for fund statements by going to Mailings > Select Recipients > Use an existing list and choosing the correct file for your document type.
2. Take your mouse and click directly to the right of the field right after the parenthesis after the field name:

3. Delete the field all of the way back to the = sign:
 4. Go to Insert Merge Field, find the merge field you need to add and select it. Be sure that you are selecting the correct merge field. In this example AppExploreDir is being chosen because that is the field was deleted above in the step #3 example.
5. You will now see your field added as a merge field when toggling ALT F9.
Do the same for all fields remaining and then save document.

Was this article helpful?
