Importing AP Vouchers
- 21 May 2024
- Contributors

- Print
- DarkLight
- PDF
Importing AP Vouchers
- Updated on 21 May 2024
- Contributors
- Print
- DarkLight
- PDF
Article summary
Did you find this summary helpful?
Thank you for your feedback
Importing AP Vouchers
You can automatically create Administrative Vouchers by importing data from a comma-separated value (.csv) spreadsheet file. The AP Voucher Import utility will also create new Vendor Profiles if needed.
This utility can save you data entry time for regularly scheduled Vouchers such as:
- Credit card statements
- Monthly utility bills
- Rent payments
- Payroll entries
- Monthly income payments for annuities
- Cash/money transfers if you use a check to move the money
CAUTION: There is currently no automated procedure to remove imported Voucher data following a successful import. Back up your FIMS database before running the utility. Testing the utility in your Test & Learn database is also recommended.
Once you’ve prepared your .csv file in Excel, you can import the new Vouchers and Vendor Profiles as follows:
- From the main menu, select File Maintenance > AP Voucher Import. The AP Voucher Import window opens.
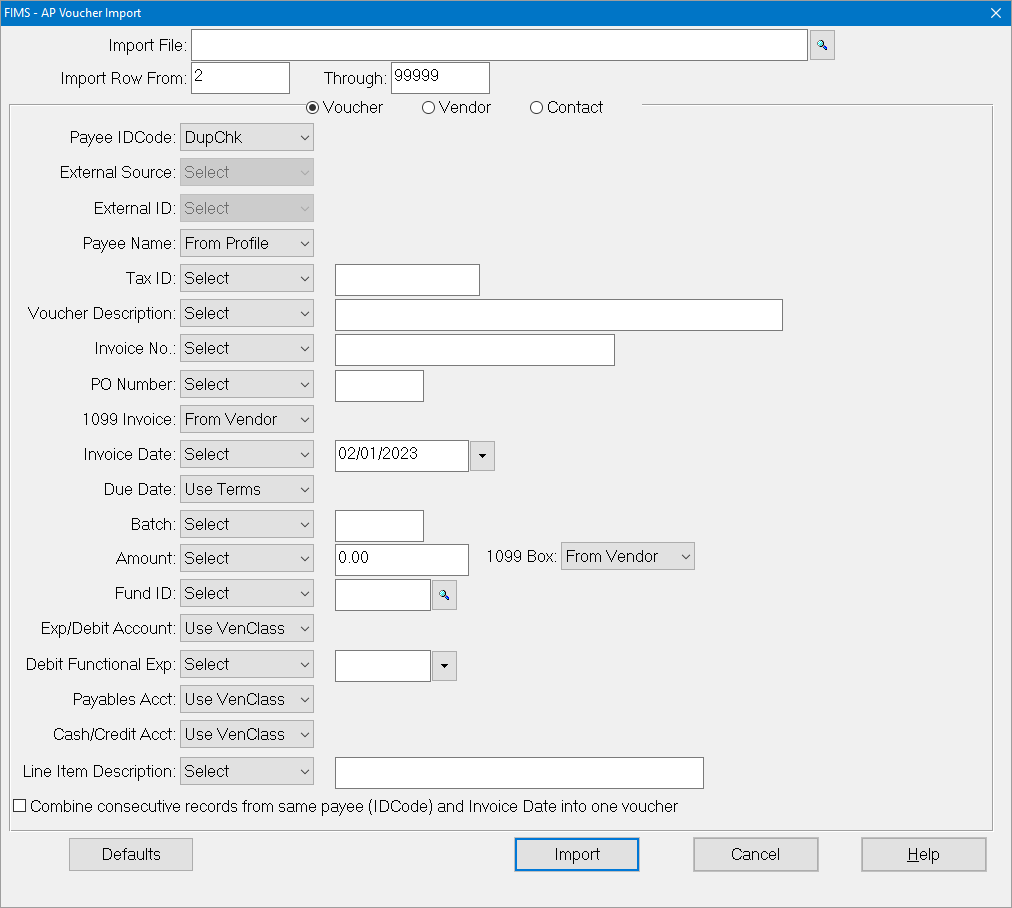

- Select the file to import by clicking the browse icon next to Input File field. Data from this file will be imported.
- If you want to specify which rows in the spreadsheet to include, you can enter the first and last row numbers.
- For each listed FIMS field, specify which spreadsheet column holds the equivalent value. Choose carefully.
- Use the radio buttons in the top left to page through the list of fields for Vouchers, Vendors, Contacts, and Others.
- If you did not include a particular field in your data file and you want to apply the same value to all vouchers in this file, select Select in the field’s dropdown; to the right, you can now enter that set value.
- Once you have completed mapping the FIMS fields to your spreadsheet’s columns, save your import settings by clicking Defaults. This will prevent you having to map the columns again each time you import vouchers.
- Select the check box at the bottom of the form if you want to combine records for the same payee (based on ID Code) and Invoice Date into one Voucher. All spreadsheet rows where both payee ID code and date match will be rolled up into one Voucher.
- Click Import to perform the import and create new Vouchers and (as needed) new Vendor Profiles.
Was this article helpful?
