User Defined Profile Export
- 06 Nov 2024
- Contributors


- Print
- DarkLight
- PDF
User Defined Profile Export
- Updated on 06 Nov 2024
- Contributors
- Print
- DarkLight
- PDF
Article summary
Did you find this summary helpful?
Thank you for your feedback
User Defined Profile Export
This export allows you to select the actual fields that you want to export. You can export any field from the Profile, Donor, Grantee, or Student table, and you select the desired field(s) from the Fields tab on the FIMS Report Selections window (only available for user defined exports). You can control the order of the fields by moving them up or down in the list. Fields from the same tables are also available on the Selection and Sorting criteria for the export.
This export also allows you to export custom fields created in FieldMaker.
NOTE: You can access this export from anywhere in FIMS by selecting Reports > Profiles > User Defined Profile Export.
NOTE: You can create Contacts or add Affiliation codes to each unique Profile ID code included in this report, directly from the FIMS viewer. Refer to Creating Contacts from Reports and/or Exports in the Introduction and Adding Affiliations from Reports and/or Exports in the Profile Management module for more information.
IMPORTANT: The fields you choose on the Selections or Affiliations tab have an influence on which records are exported — regardless of which fields you choose to export. For example:
- If on the Selection tab, you select to see Profiles based on the city they live in, and you select fields from the Donor record for export, all Profiles from the selected city will appear — regardless of whether they have a Donor record.
- If you make Selections from the Donor table, only Profiles with the Donor information selected will be exported.
- For those with the FieldMaker module, all fields set up become available for exporting or selection.
- Choose fields to export that match with those chosen in selection so you can confirm that you are getting the records you want.
- After setting up all the tabs with selections, sorting, and fields, save the setup on the Saved Reports tab so you can easily run the same export in the future.
Running the User Defined Profile Export
NOTE: This example creates an export that shows the dates when a Donor gave their first, last, and largest Gifts.
Keep in mind that although this example uses specific fields, you can select any fields you need for this export.
- In the Profile Management module, select Reports > User Defined Profile Export.
User Defined Profile Export – Fields Tab
- Click the arrow in the drop-down box at the top of the tab and select the desired table.
- Select the desired field(s) and click the Add button to add them to the export. Only the fields selected on this tab will appear on your report.

NOTE: You can change the order of the fields in the export by selecting a field in the right-hand pane and clicking either the Move Up or Move Down button.
TIP: If you select the (Profile) Address field, all of the following fields will be exported: Name, Org. Name, Title, Address 1-2, City, State, Zip, Salutation, E-mail, Web Site, Work Phone, and Explore Directory (Profile folders).
- (Optional) If you want to export information from any of your Notepads for the Profile, click the Notepads tab.
User Defined Profile Export – Notepads Tab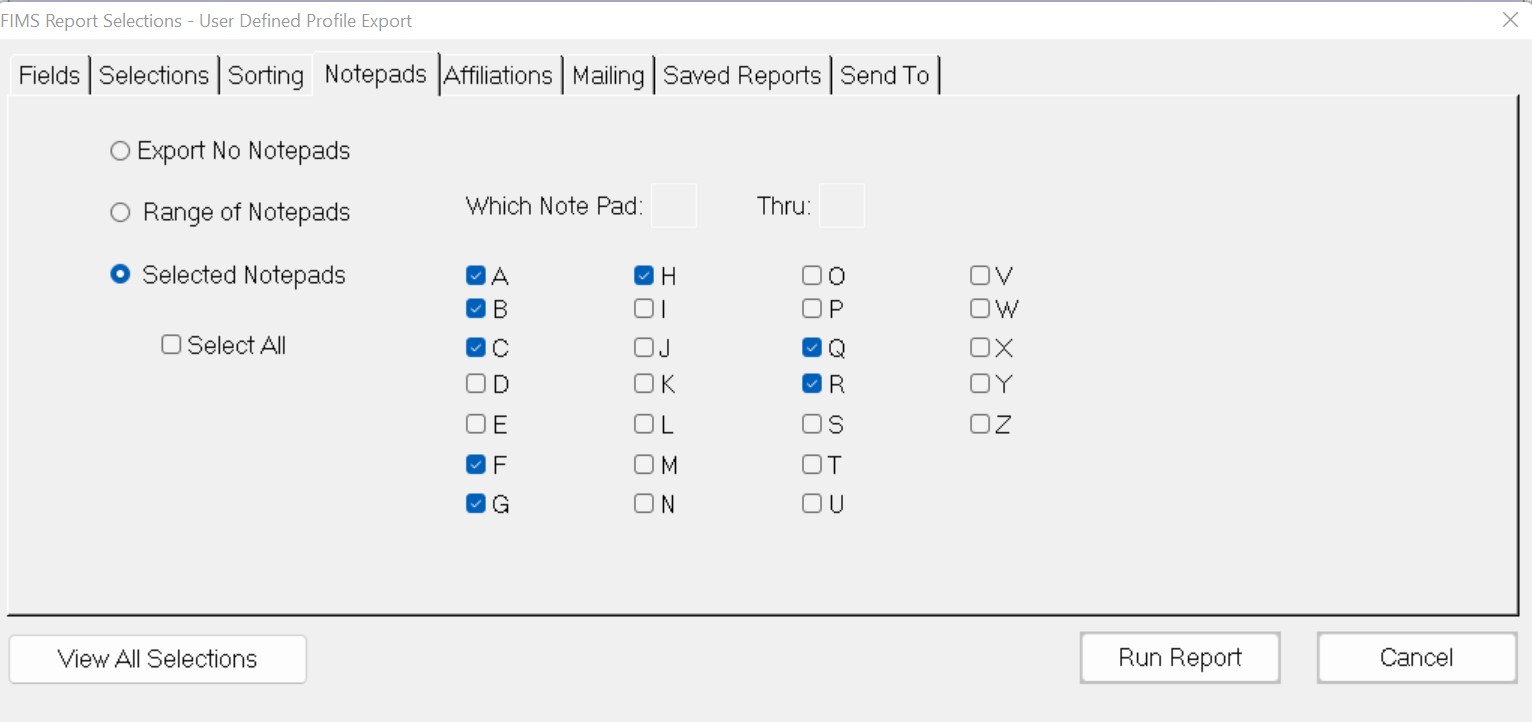
- Do one of the following:

- If you do not want to export any notepads, select the Export No Notepads radio button (this is the default setting).
- If you want to export a contiguous range of notepads, select the Range of Notepads radio button, and then enter the desired notepad range.
- If you want to export several non-contiguous notepads (or a single notepad), select the Selected Notepads radio button, and then select the checkbox for each notepad that you want to export.
- When you are finished selecting the fields and notepads that you want to export, use the remaining tabs (Selections, Sorting, Affiliations, Mailing, Send To) just as you would in any standard FIMS export.
- When you are finished configuring the export, click the Saved Reports tab.
User Defined Profile Export – Saved Reports Tab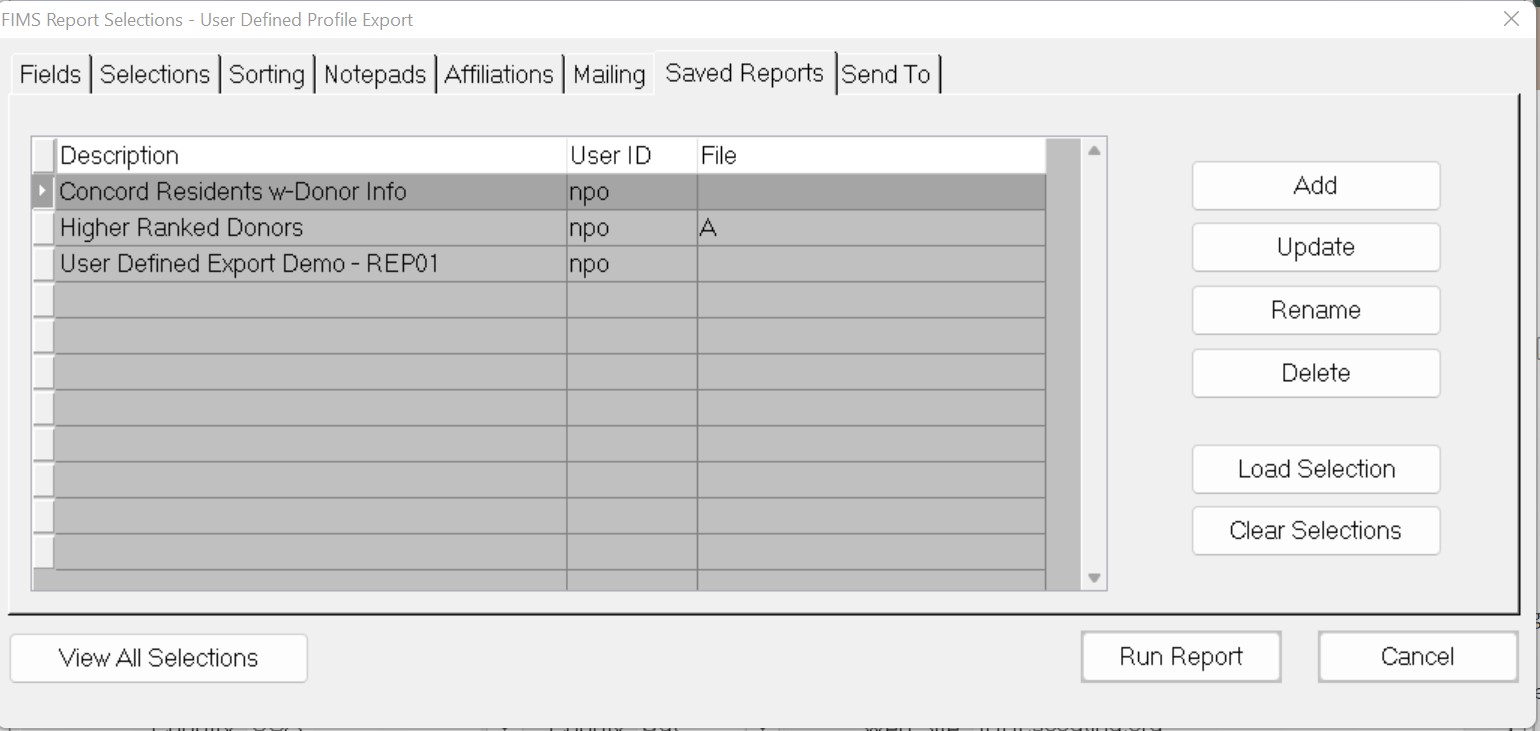
- Click the Add button to add this configuration to your list of default exports. You will be prompted to add a description for the export to identify it the next time you want to use it.

NOTE: This feature allows you to run the export at any time, without having to manually select the desired fields, selections, and sorting criteria each time you run it. Simply go to the Saved Reports tab, select the desired export, and then click the Load Selection button.
TIP: If you configure an export that you will run on a regular basis, name the export Default. The system will automatically load the default export settings for you the next time you run the export (but you can change the settings or choose a different export if desired).
- Click the Run Report button to export the selected information. You can then open it in Word or Excel to create presentation quality reports. Refer to Using FIMS with Microsoft Office for more information.
Example: User Defined Profile Export Result in Excel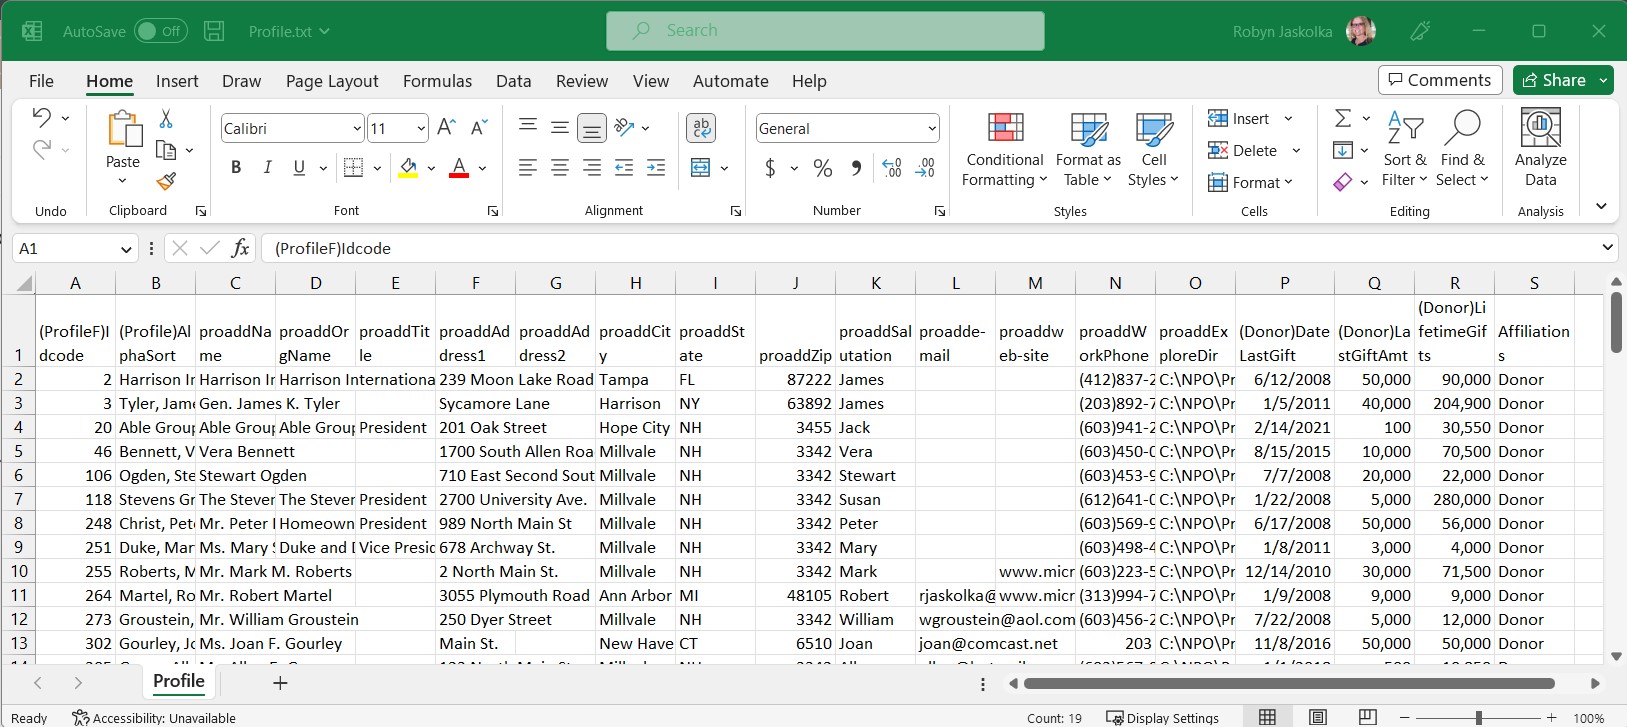

Example: User Defined Profile Export Result in a Word document.jpg)
NOTE: If you use the ID Code field as the first field in your export, you may receive an error when you try to open the file in Microsoft Excel. If you receive an error when opening in Excel, try running the export with a different field in the first column.
Was this article helpful?
