Create A New Workflow Template (FC Grants)
- 17 Jan 2023
- Contributors


- Print
- DarkLight
- PDF
Create A New Workflow Template (FC Grants)
- Updated on 17 Jan 2023
- Contributors
- Print
- DarkLight
- PDF
Article Summary
Share feedback
Thanks for sharing your feedback!
There are three parts to creating a new workflow template: Components, Task Configuration, and Creating the template. We will walk through each.
Components
- Go to Control Panel > Config > Workflow > Components.
- Add all the components that are necessary for a workflow template to be complete by adding and/or verifying that the Tasks, Outcomes and Statuses are set up.
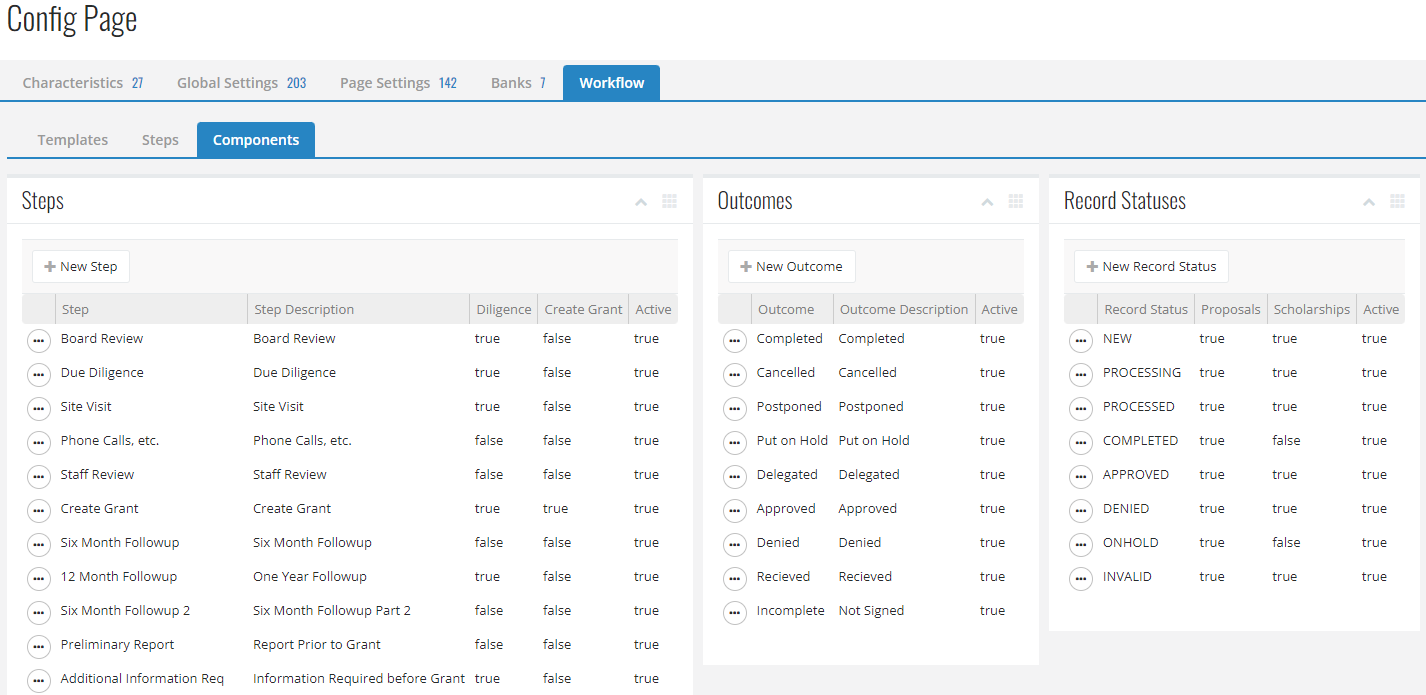
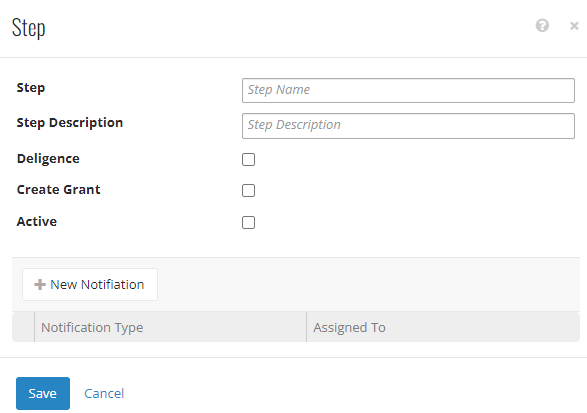
- To add a task click +New Step, in the modal, enter a task name (e.g. Grant Agreement Received) and a task description (not required). The Active box must be checked for this task to be available to use in a template. A workflow task can also be used for Diligence and Create Grant, but not both. A discussion on Diligence steps is included in Applying Workflows.
- The user can create and add a notification for an internal user based upon this step.
- Adding Workflow Outcomes - The Outcomes available on the Components tab should be reviewed to make sure that the outcomes are available.
- To add a new Outcome click +New Outcome and enter the Outcome name and optional description. Check or clear the Active check box to make the option available or not.

- Adding Workflow Statuses - The Statuses available on the Components tab should be reviewed to make sure that the required statuses are available. These statuses will update the status of a proposal or scholarship application as workflow tasks are completed.
- To add a new Record Status click +New Record Status and enter the Status name. The Proposals and/or Scholarship boxes should be checked if the status is going to be used on those record types. It is NEVER recommended to have your own custom statuses. It’s always best to use the ones out of the box as listed in the first screen shot. Check or clear the Active check box to make the option available.


Once all the components needed for a workflow template are available, the next step is to configure the tasks on the Task tab.
Configuring Workflow Tasks
The next step in creating a workflow template is to configure the individual tasks with status and outcomes. Tasks can be added to three different tiles – Grants, Proposals and Scholarship Applications.
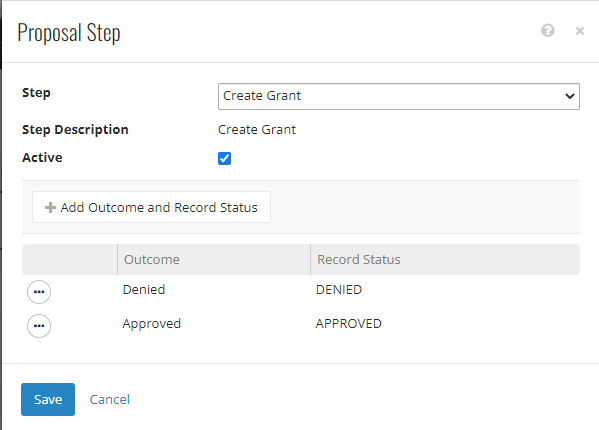
- To add a new step Click +New Grant, +New Proposal, or +New Scholarship depending on which record you are defining the step for.
- Use the dropdown list to to select from available tasks (created in the components tab). Only the tasks that are not already apart of the task list for that tile will be listed as available.
- Once the task is selected, click the Active box. The option to configure a step outcome to change the record status is available not necessary for every step. For Example, a typical step that does change is record status is Create Grant. In this case, when the step called create grant has an outcome of Approved, the proposal status will change to APPROVED, likewise, if the Create Grant step has an outcome of Denied the record status will update to DENIED. *Do not repeat Outcomes with different status as this will lock the Workflow task.
 *Note: Even though the Status column is shown on the Grant Workflow task, a Status cannot be selected. Workflow tasks cannot change the status of a grant.
 *Note: E
Building a Workflow Template
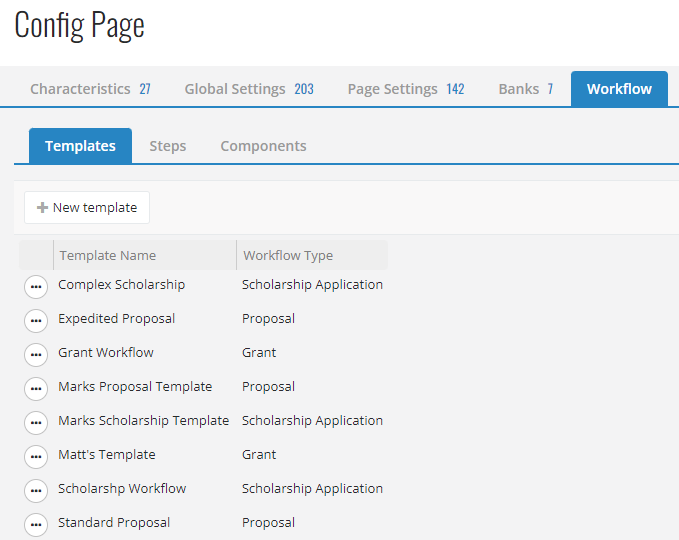
- Now that the workflow components and tasks are completed, the third step is to build the actual templates. The templates are built on the Templates tab of the Workflow Configuration function. To build a template, open the Templates tab and then click +New Template.
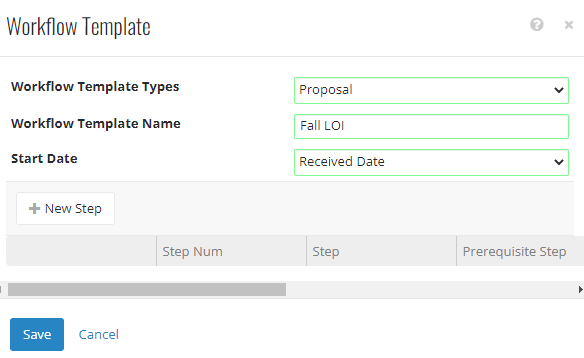
- In the new modal, configure this template.
- Use the drop-down list for the Workflow Template Type field to select the type of record (grant, proposal or scholarship application) the workflow template will used with. Enter an identifying name in the Workflow Template Name. The Start Date currently defaults to Received Date, but other dates may be added in the future. The Start Date is used to calculate when tasks are due.
- Use the drop-down list for the Workflow Template Type field to select the type of record (grant, proposal or scholarship application) the workflow template will used with. Enter an identifying name in the Workflow Template Name. The Start Date currently defaults to Received Date, but other dates may be added in the future. The Start Date is used to calculate when tasks are due.
- To add a workflow task to this template, click +New Step.
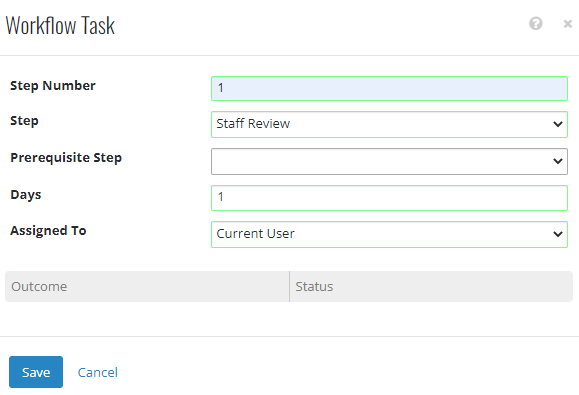
- In the new modal, configure this step:
- add a step number.
- choose a task from the dropdown menu.
- step 1 does not require a prerequisite, for the subsequent steps, use the dropdown to select a prerequisite step (this is vital for supplemental pages to trigger in Foundation Cloud Community Portal (FC Community Portal))
- enter the number of days from the Received Date that this task is too due.
- Select the Foundation Cloud Grants (FC Grants) User the task is to be assigned to from the drop-down list. The user selected can be a role (i.e., Current User, Record Manager of Program Area Person) or it can be an actual FC Grants username.
- click SaveNote:Supplemental pages such as Six-Month Report, or Final Report must be assigned to Web User - this along with the required prerequisite task will trigger the supplemental page in FC Community Portal for the applicant to complete.
- Keep repeating the process until all the steps needed are added to the template. Below is an example of a proposal workflow template.


Notes:
*A Proposal or a Scholarship Application workflow template must have at a minimum, two workflow tasks.Was this article helpful?
