Configure View Settings
- 26 Dec 2024
- Contributors

- Print
- Dark
- PDF
Configure View Settings
- Updated on 26 Dec 2024
- Contributors
- Print
- Dark
- PDF
Article summary
Did you find this summary helpful?
Thank you for your feedback!
Configure View Settings
FIMS provides you with several system-generated Data Grid views that contain commonly used View Settings. You can't change system-generated views, but you can use them as templates to create your own views.
One of these system views is called the Default View. Each supertab has its own Default View, which is a system-generated view that you can return to any time by clicking the Default View button on the Data Grid toolbar.
Note: In most modules, the Default View is an optimized view; however, there are a few places (for example, in FACTS, and Accounts Payable) where the Default View is a full view.
You can create your own custom views, or copy any existing view as a template for a new view. The name of the view that is currently in use displays in the View Selection drop-down box on the top left of the data grid. You can also use this drop-down to select a different data grid to open.
Note: This procedure takes you through the process of creating a new Data Grid view from scratch.
To create a custom Data Grid view:
1. Open a Data Grid and click View Settings.

Example: View Settings Window (Views Tab)
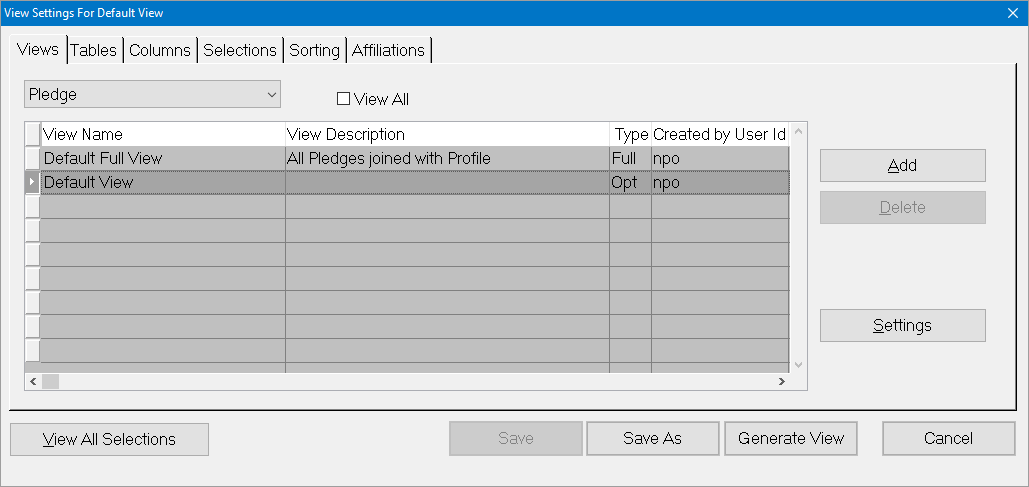
Views lists all of the currently configured views, along with a description of each, the User ID of the person who created it, the table(s) that are included, the module it applies to, whether it is a System View or a Shared View, and when it was last changed.
System Views (for example, the Default View) and Shared Views will always display in this list, along with the views you create. To see all of the views created by all users (whether they are shared views or not), select the View All checkbox at the top of the tab.
Last views do not appear in the list when View All is selected.
If you want to use an existing view as a template, select it from the list, click Save As, then follow the remaining steps in this procedure.
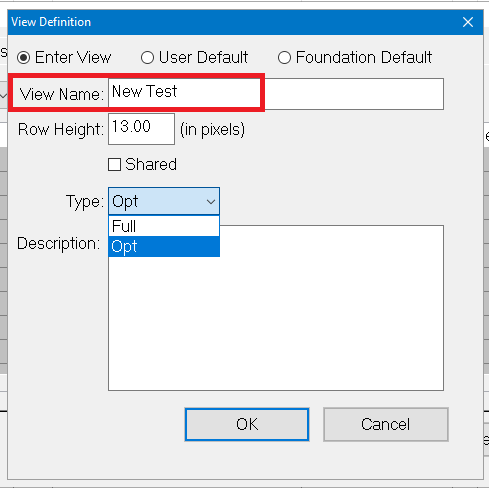
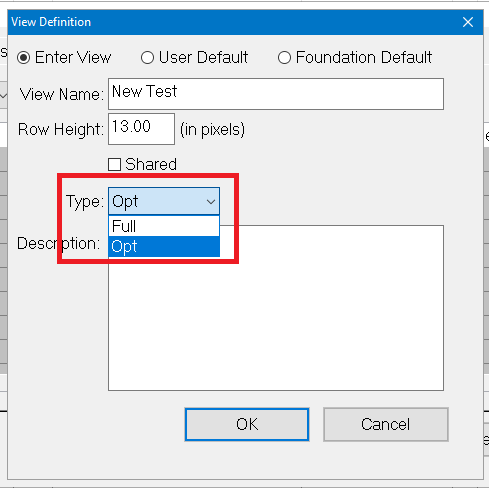
2. Click Add. You will see the View Definition window open:
.png)
3. In the View Name field, enter the name that you want to use for the view. This name will display in the View Selection drop-down box at the top of the data grid when you generate the view. It will also be the name that appears in the list of available views on the Views tab in View Settings.
Note: If you name your view User Default View, it will automatically be used instead of the system Default View each time you open the module. Refer to Data Grids for more information about the available Default Views.
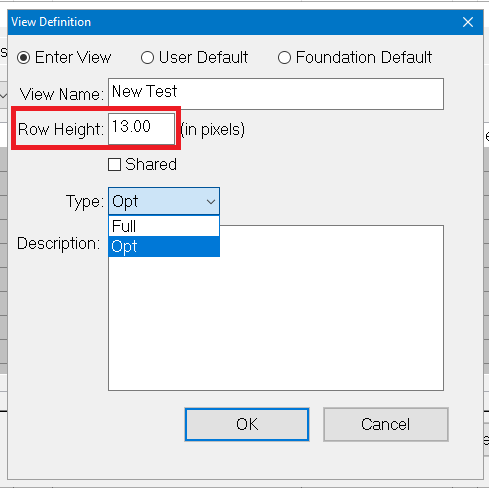
4. In the Row Height field, enter the default size (in pixels) that you want to set for each row in the grid. The default size is 13 pixels.
5. (Optional) If you want this view to be visible when any user opens the Views tab on the View Settings window, select the Shared checkbox.
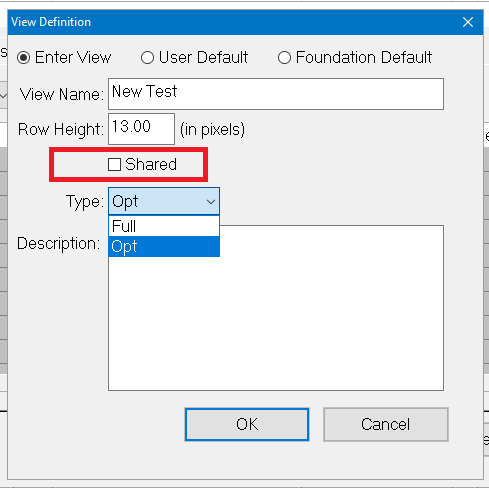
If you clear this checkbox, the view will still be available to other users when they select the View All checkbox on the Views tab in the View Settings window.
6. (Optional) If you want to change the view type (full or optimized), click the arrow in the Type drop-down box and select either Full or Opt.
7. In the Description field, enter a short text description of the view.
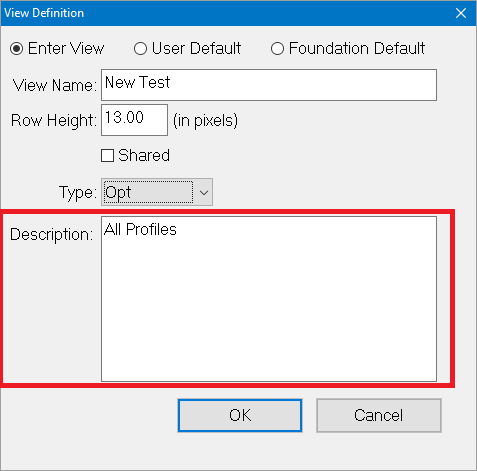
8. Click OK to return to the View Settings window. The new view will now be listed (and selected) on the Views tab.
.PNG)
9. Click the Tables tab. Select the table(s) whose fields you want to include in your view
Tables Tab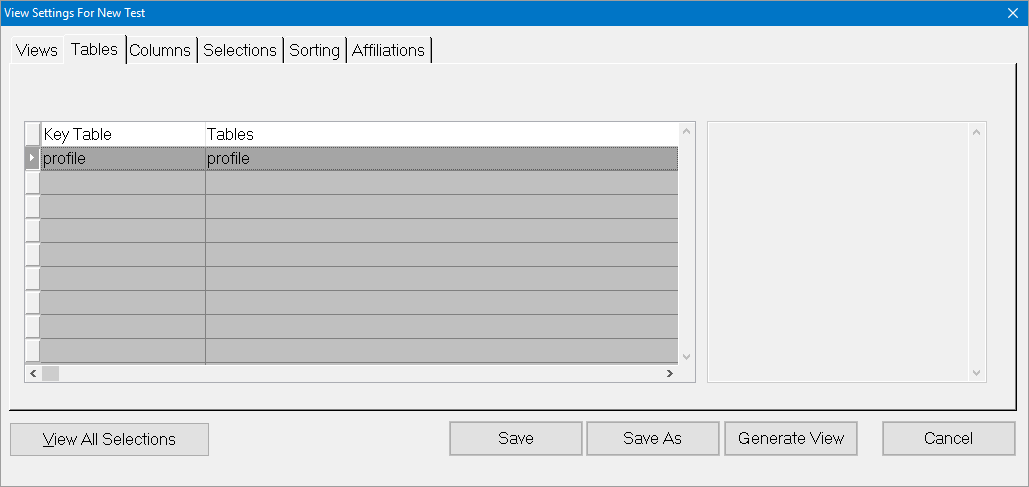
Only the tables that are available for the current module are available on this tab. If you are editing an optimized view, only the primary table for the current module and tab will be visible. For example, if you are on the Donor tab in Donor and Gift Management, you will only see the Donor table. If you are on the Unposted Gifts tab, you will only see the Gift table. To see a list of all available tables for the supertab or module, you must create or edit a full view.
Most table relationships are referred to as an inner join relationship. This means you would only get those records that have data in all tables listed in the table combination. For example, if you use the profile,donor table combination, you will only get profiles that also have a donor record. If the profile,donor table combination has an outer join relationship, that means you would get profiles whether or not they have a donor record.
10. Once you have selected the table(s) whose fields you want to include in your view, click the Columns tab.
Columns Tab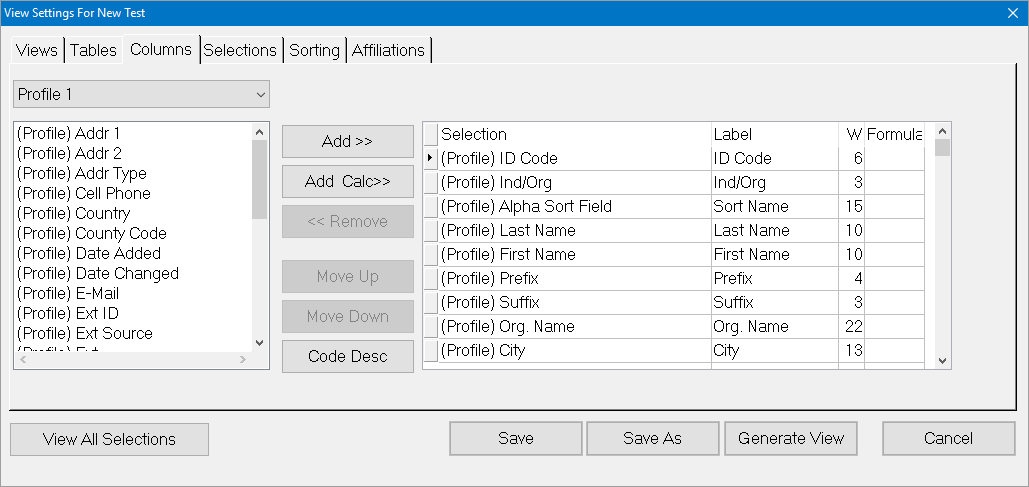
2020 Update: For the Profiles Data Grid, you can add an Affiliation column to view
11. Click the arrow in the Table drop-down box at the top of the window and select the desired table.
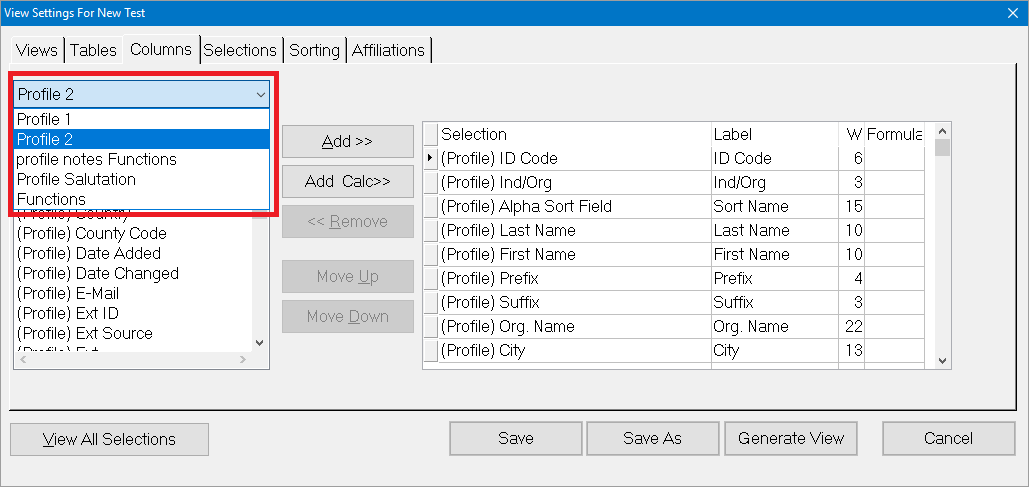
Note: In many cases, this drop-down contains a Functions item, along with the standard FIMS tables. The Functions list contains pre-configured calculated fields that you can add as columns.
12. In the left-hand pane, select each field that you want to use to create a column in the view, and click Add.
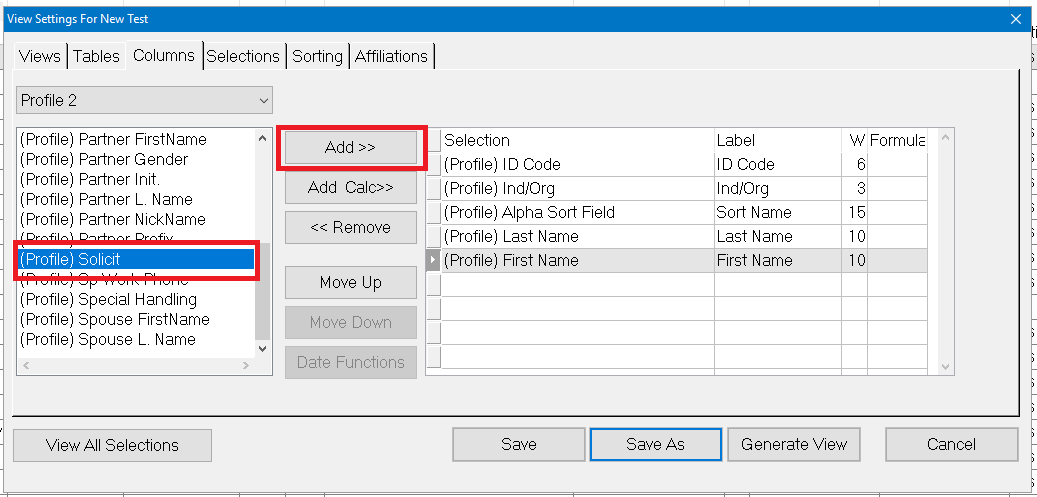
- You can add multiple fields at one time by holding down the Ctrl key on your keyboard and selecting multiple items from the list before clicking Add.
- If you want to remove any fields from the list, select the desired field in the right-hand pane and click Remove. You can select all of the fields at one time by clicking on any column and pressing Ctrl+A on your keyboard.
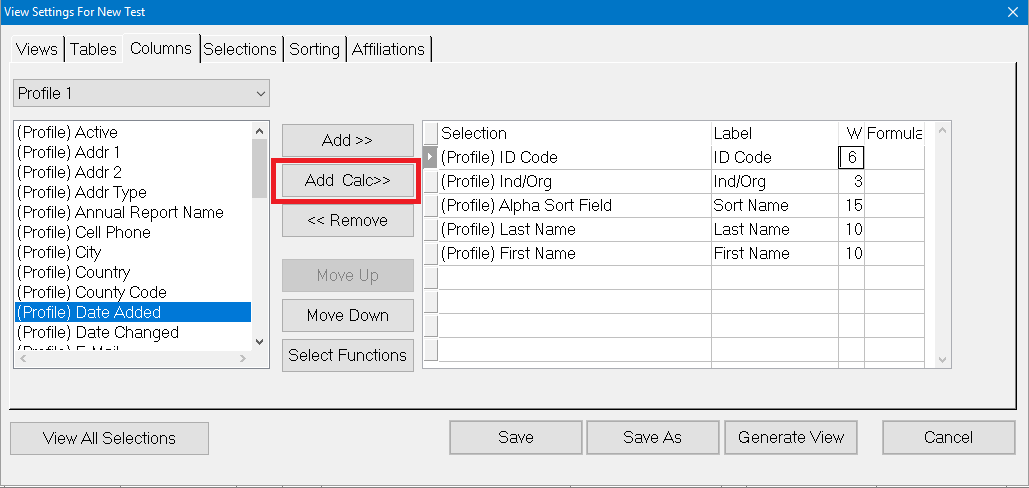
- If you want to combine multiple fields into a single column, add the desired fields, and click Add Calc. See Creating Calculated Columns for more information about creating calculated columns.
- (Optional) If you select a field that originates from a code table, a Code Desc button will be available. If you want to add the Code Description as a column in your view, along with the code itself, click this button. If you only want to include the description in your view, but not the code itself, simply mark the code field as hidden. You cannot remove a code field and keep the description
Note: This button is only visible when you select a code field in the left-hand pane.
Example: Code Desc Button
.PNG)
13. (Optional) If you select a date field, a Date Functions button will be available. If you want to display only a portion of the date (for example, just the date, month, or year), click this button and select the portion of the date you want to use.
You may want to use a date function if you want to do any of the following:
- Display the month from the Birth Date field to select Donors to send birthday cards to.
- Display the year from the Gift Date so exported data can be subtotaled by year.
- Display the year a Fund was established to allow for sorting by Year and Fund Name.
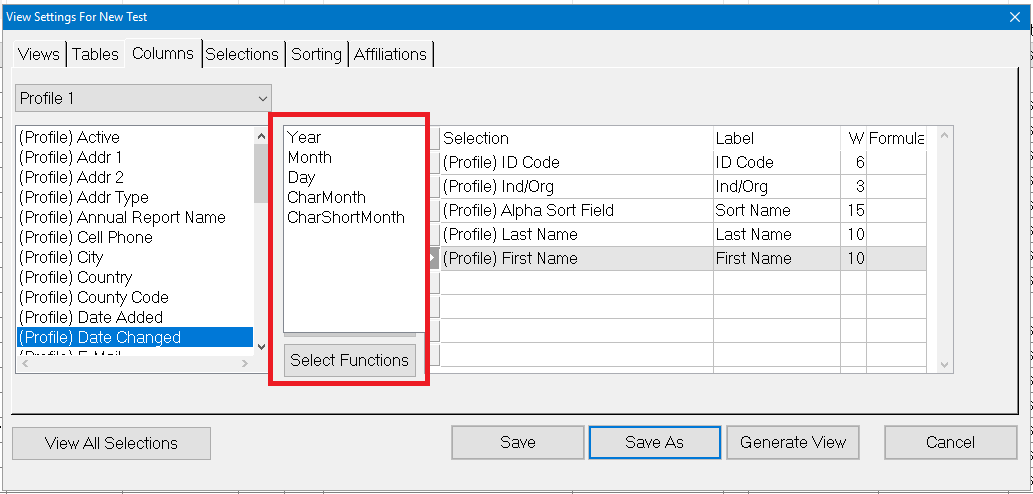
When you click the Date Functions button, the label changes to Select Functions, and a list opens where you can select the date function(s) that you want to include.
Example: Date Functions Button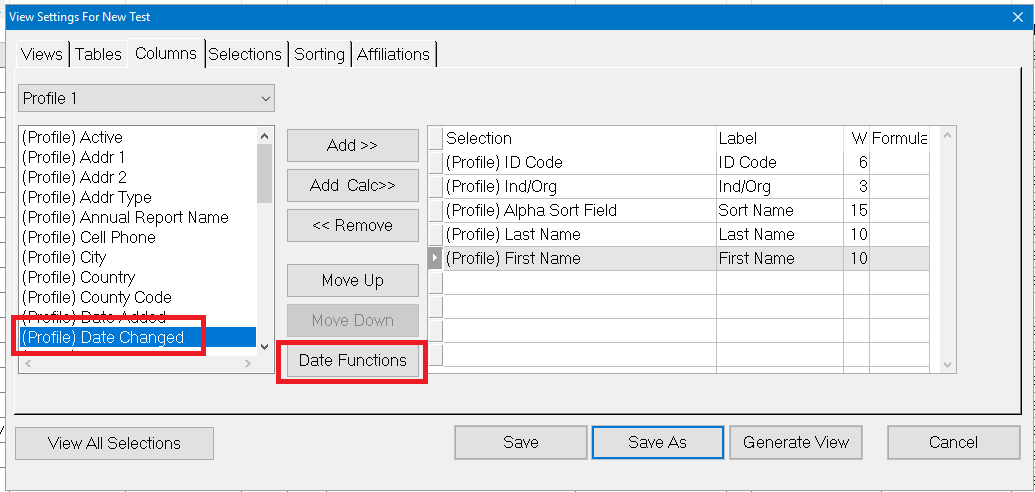 Example: Select Functions
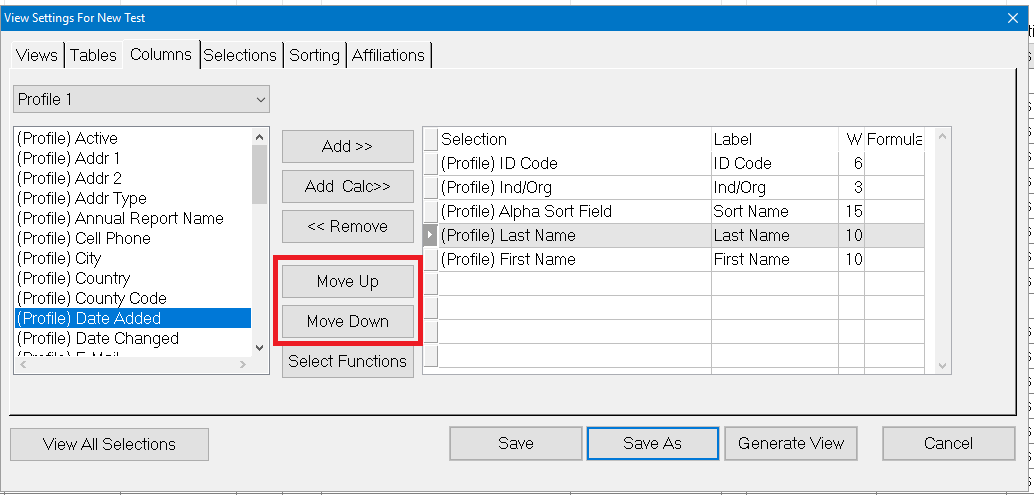
14. (Optional) If you want to rearrange your selections, click the Move Up or Move Down buttons until your criteria are in the desired order. The order of the fields in the list will be the order of the columns going across the data grid, from left to right.
15. (Optional) If you want to change the label for any of the columns, click in the Label field in the right-hand pane, and enter the desired label.

16. (Optional) If you want to change the default width for any of the columns, click in the W (width) field, and enter the desired width, in number of characters. To use the system-default value, leave the number at 0.
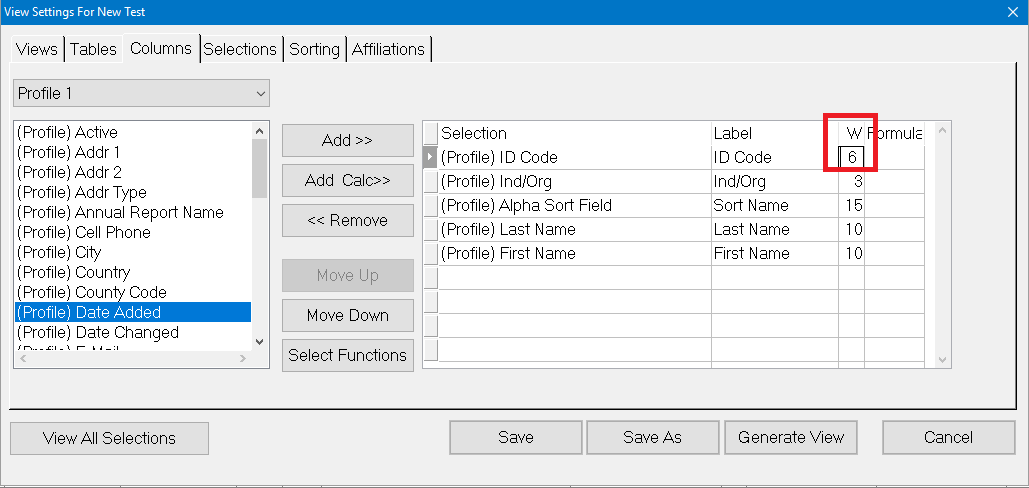
Tip: You can also change the width of a column directly on the Data Grid by clicking and dragging the column border to the desired width, and then right-clicking and selecting Save View Settings.
17. (Optional) If you want to add formulas as columns, click Add Calc, and then click the arrow in the Formula drop-down box to enter the desired formula. Refer to Creating Calculated Columns for more information.
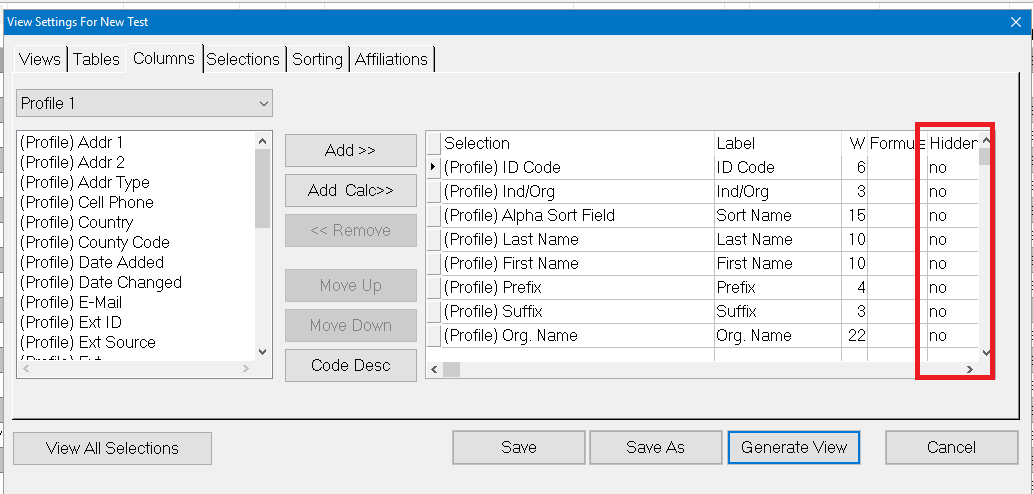
18. If you want to hide any of the columns from view, enter Yes in the Hidden field. Otherwise, leave the value at No (the default).
You may want to hide columns when you are doing one of the following:
- Using fields in a calculation – so you can only see the end result and not all of the individual pieces.
- Adding a code and a description to your view, and only want to see the description.
- Adding a date function an only want to see the result.
Tip: The Hidden field is only available in Full Data Grid views.
19. (Optional) If you want to set one of the fields as your default Search By field, select the desired field, then right-click and select Set current row to be Default Search By. This is useful if you want to create a view where the initial sort order is different than the initial search order (for example, if you want to sort your view by date, but search by record number).
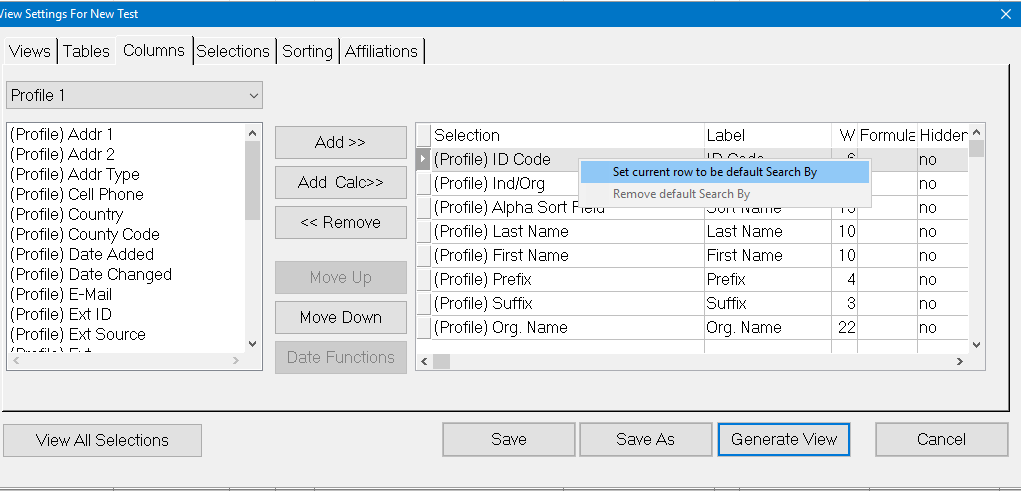 Note: This option is only available in Full Data Grid views.
20. (Optional) To limit the records that appear in your view, click the Selections tab and select the desired filtering criteria. Only records that match your selections will display in the view.
Selections Tab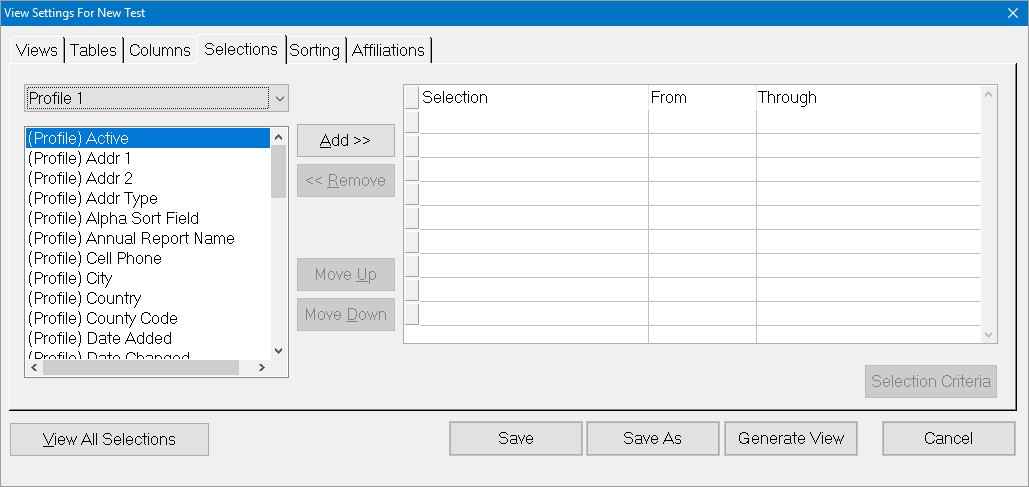 Selections for data grids work the same way as Selections for reporting. See Choosing Selection Fields.
If your data grid contains a single database table, you can use either And or Or to relate your selection criteria. However, if your data grid contains multiple database tables, you cannot use an Or to relate your selection criteria. You can only use And.
If you do not make any selections on the Selections tab or the Affiliations tab, the view will display all records in the database that apply to your selected columns.
21. (Optional) If you want to set the sort order for your view to something other than the default primary field, click the Sorting tab, and select the desired sorting criteria.
Tip: If you're creating an optimized view, you can only sort by indexed fields. If you are creating a full view, you can sort by any column in the view. You cannot sort by hidden columns.
Sorting Tab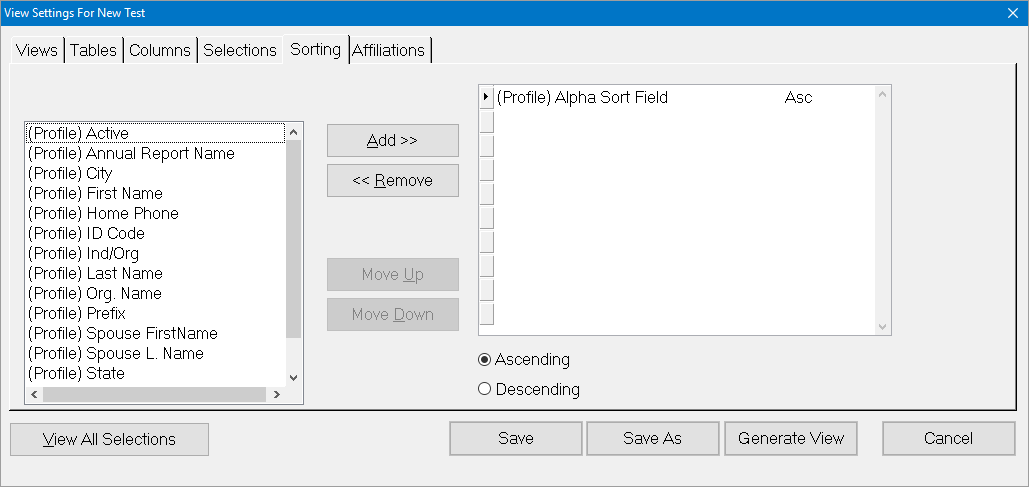 22. For each selected sorting criteria, select either the Ascending or Descending radio button to determine whether the view will be sorted in ascending (A through Z) or descending (Z through A) format. The default sort order is Ascending.
23. (Optional) If you want to limit the records in your view based on whether they contain one or more Affiliation codes, click the Affiliations tab and select the desired Affiliation code(s).
This tab is only available for full views that include Profile fields. You cannot select Affiliation codes to filter optimized views.
Affiliations Tab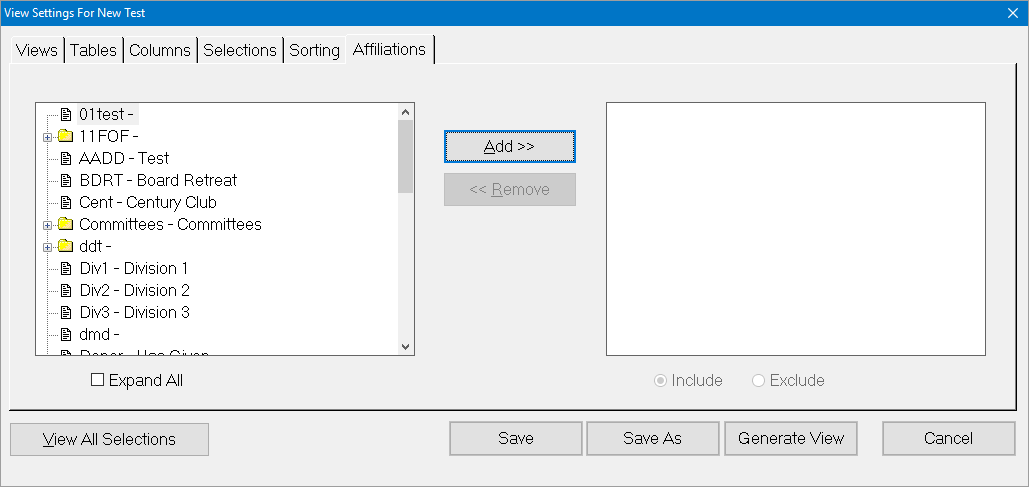 24. For each Affiliation code, select either the Include or Exclude radio button to determine whether you want to include or exclude the records that contain those Affiliation codes (for example, if you choose Board of Directors (Include) and Development Committee (Exclude), then all Profiles who have the Board of Directors affiliation code will be selected, but if they also have the Development Committee affiliation code, they will not be selected).
25. Click Save to save your view.
26. Click Generate View to display the current view in your Data Grid.
Was this article helpful?

