Mass Add/Delete General Ledger Accounts
- 09 Oct 2023
- Contributors

- Print
- Dark
- PDF
Mass Add/Delete General Ledger Accounts
- Updated on 09 Oct 2023
- Contributors
- Print
- Dark
- PDF
Article summary
Did you find this summary helpful?
Thank you for your feedback!
Mass Add/Delete General Ledger Accounts
The G/L Account Mass Add / Delete utility creates or deletes a single account for one or a group of specified Funds.
Note: Before you can use this utility, you must have a Master Chart record with the natural account number, description, account type, and the Fund Class(es) that need the new account. Refer to Maintaining the Master Chart of Accounts for more information.
Note: Certain revenue and expense accounts (usually representing income or fees from pooled investments) can appear twice in the Master Chart with different account types assigned to different Fund classes. The G/L Account Mass Add utility adds appropriate accounts for Funds from all the Fund classes (with the correct Account Types). However, Mass Delete deletes all accounts from all of the Fund classes. To delete accounts from a single class, you must temporarily delete all other class references from the Master Chart, and then restore them after the deletion.
In General Ledger, select File Maintenance > G/L Account Mass Add / Delete.
G/L Account Mass Add / Delete Window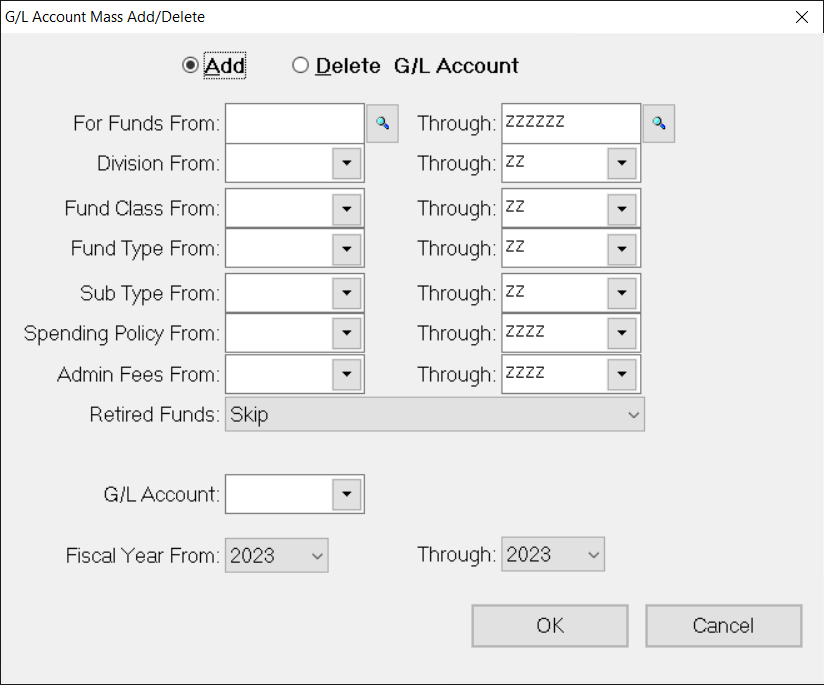
Select either Add or Delete to determine whether you want to add or delete an account.
In the Funds From / Through fields, enter the Fund ID (or range of contiguous Fund IDs) that you want to add or delete the account for.
(Optional) To filter selections based on Fund information, select the desired Division, Fund Type, or Sub Type (or range of codes). Only Funds that match your selections will add or delete the account.
(Optional) To filter the selections based on Spending Policy or Admin Fees, select the codes (or range of codes). Only Funds that match your selections are added or deleted.
In the G/L Account field, enter the natural account number for the account that you want to add or delete. If you are not sure of the natural account number, click the arrow and select the desired account from the drop-down list.
Click the arrow in the Fiscal Year drop-down box and select the year that you want to add or delete the account for.
Click OK. A confirmation message appears to make sure you are ready to proceed.
Click Yes. A message window appears to tell you how many accounts were added or deleted.
Note: When you add a new account, it will only be added to Funds that match the Fund Classes listed in the Master Chart of Accounts. If the account already exists for the Fund, the utility will skip that Fund.
Was this article helpful?

