- Print
- Dark
- PDF
Using Scholarship Quick Approval and Denial
This process allows you to quickly record decisions for a large number of Scholarship applications at one time.
NOTE: You can update the Grant Date, Grant Amount and Status Code for an application directly from the Scholarship Quick Approval and Denial window. If you change the Grant Amount, any payment lines that you set up in the application will automatically be updated to match the new amount.
- In the Scholarship Management module, click the Applications supertab and then click the Processes tab.
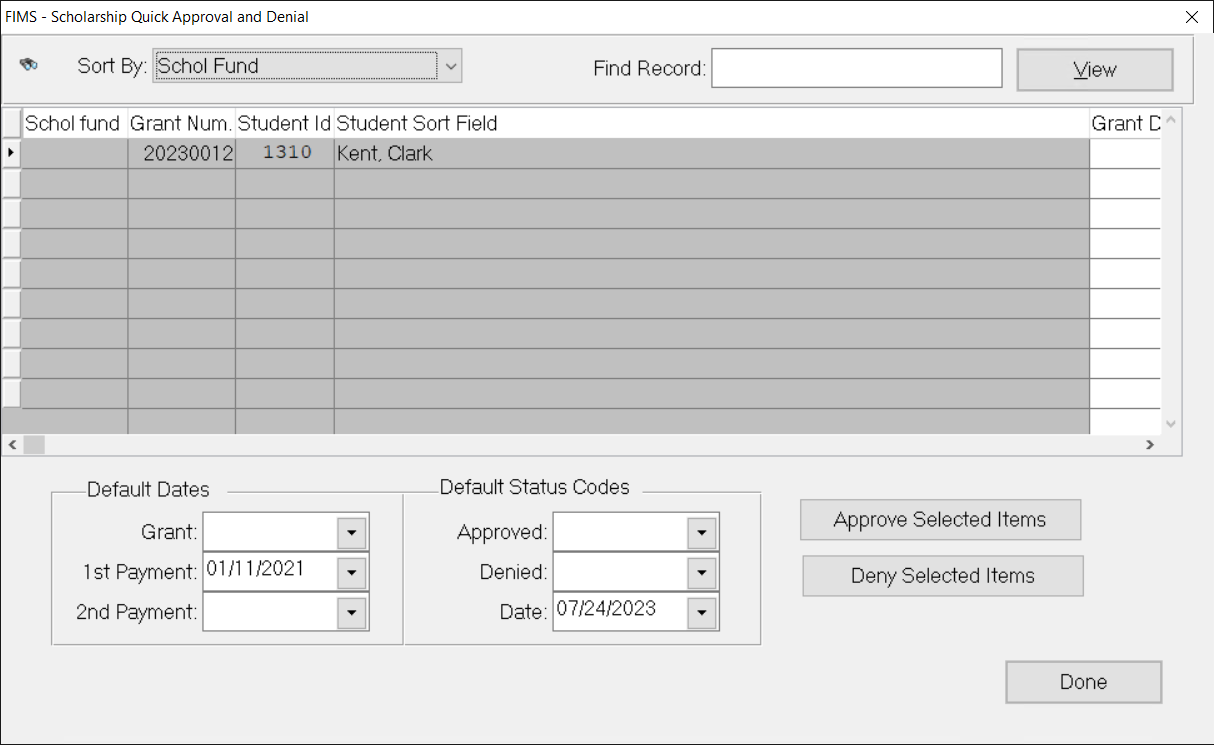
- Select Scholarship Quick Approval and Denial from the Scholarship Processes list, and then click the Run Process button. The Scholarship Quick Approval and Denial window opens.
Scholarship Quick Approval and Denial
- In the Default Dates section, enter the desired Grant date and Payment date(s) that you want to apply to the group of applications.
- In the Default Status Codes section, do the following:
- In the Approved and Denied fields, enter the status codes that you want to apply to approved applications (for example, app) and denied applications (for example, den).
- In the Date field, enter the date when you want to apply the status change.
- Select the applications that you want to approve or deny.
To select multiple applications, hold down the Ctrl key on your keyboard while you click the desired application lines with your mouse. You can also select a continuous group of applications by clicking the first application in the group, then holding down the Shift key on your keyboard and clicking the last line in the group.
- Either click the Approve Selected Items button to approve all of the selected applications, or the Deny Selected Items button to deny all of the selected applications.
- You can repeat this process for other groups of applications. When you are finished, click the Done button.
Tip: One-Step Approval Process
If you are only entering approved applications into the system, you can approve them as you enter them, without using the Quick Approval and Denial process. When you start entering your applications, set the default Action code to Approved, and set the default Grant Date and Payment Dates appropriately. Then you only need to enter the Student ID, Grantee ID, Scholarship Fund ID, and Grant Amount to complete each approved application (at a minimum). The Payment Plan will be built automatically when you fill in these fields. Once you have entered all of your approved applications, you can post them all at once.


