Proposal Batch (FC Grants)
- 15 Jul 2025
- Contributors


- Print
- Dark
- PDF
Proposal Batch (FC Grants)
- Updated on 15 Jul 2025
- Contributors
- Print
- Dark
- PDF
Article summary
Did you find this summary helpful?
Thank you for your feedback!
The Proposal Batch process is used to group proposal applications together allowing them to be processed as a unit. A new proposal batch is created to group proposal applications so that funds can be allocated, workflows can be processed and grant records created. Proposal batches can be created at any time, and proposals can be added at any stage during the process.
To Create a Proposal Batch:
Hover over Batch > click Proposal Batch > +New Proposal Batch.
Name the Proposal Batch with a descriptive name or use the default: Proposal Batch X/XX/20XX. An explanatory phrase will help the user understand what type of proposals should be allocated to this check run.
Save.
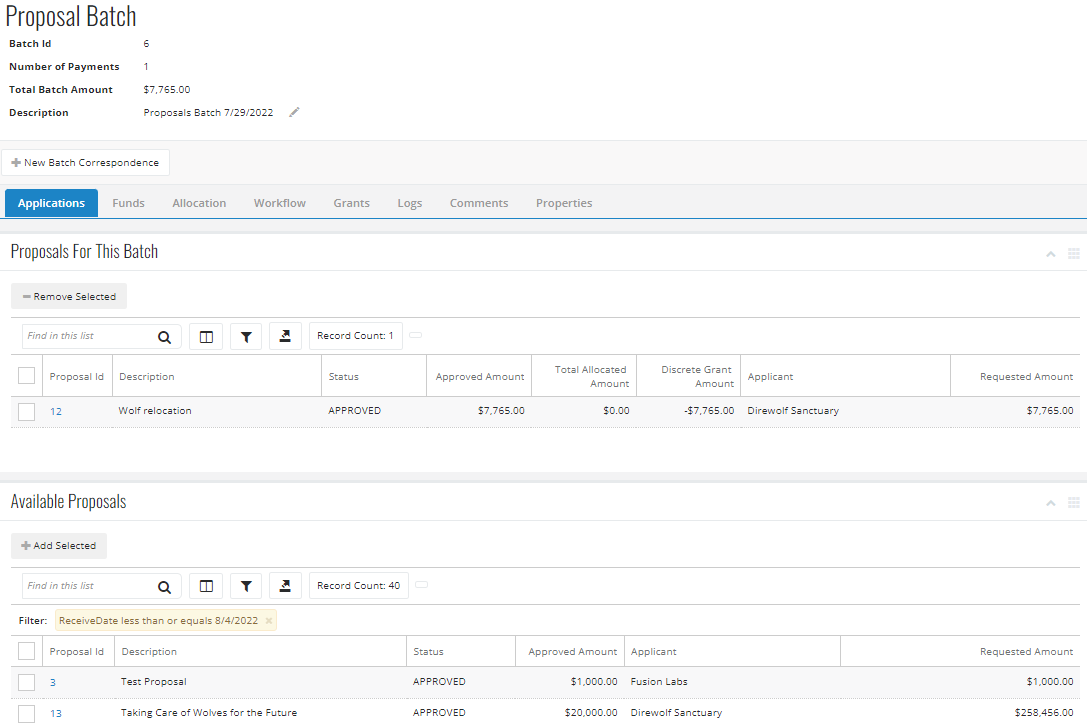
Available proposals are listed in a grid on the bottom tile called "Available Proposals". The user can filter the list by using the Filter icon on the Available Proposals tile.
By default, this grid is filtered by "Receive date" that is less than or equal to the batch creation date.
Select the proposals that will be part of this batch by clicking on the box in the far left column.
Click +Add Selected to move the indicated proposals to the top tile for processing in this batch.
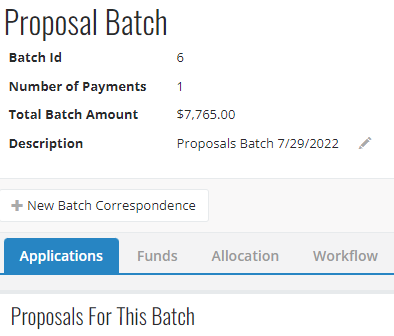
Processing a Proposal Batch
Funds Tab
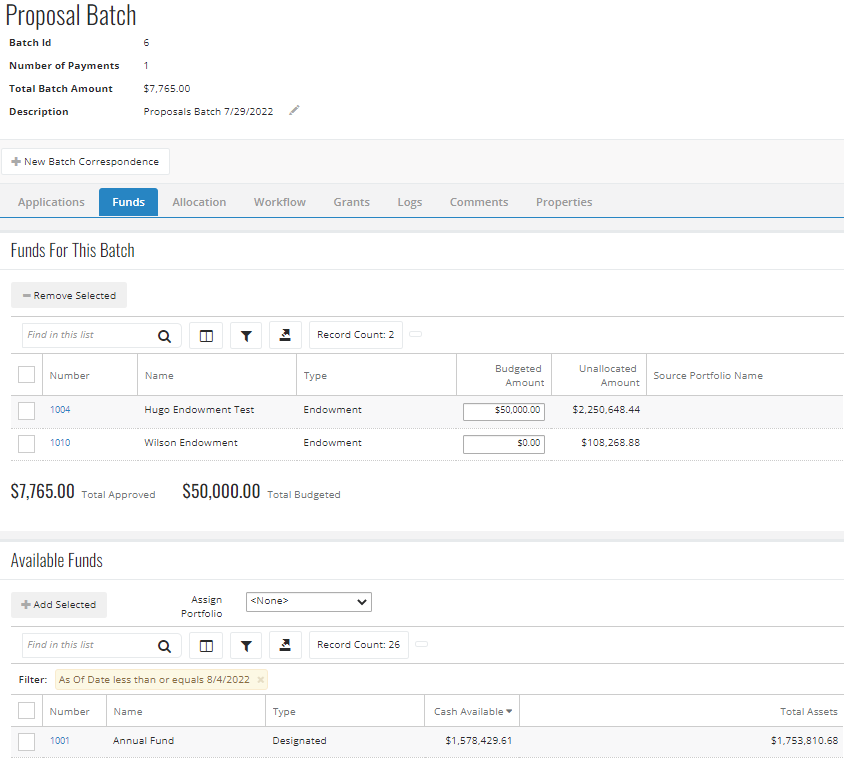
The Funds tab allows the user to assign a fund(s) for use in this batch. Similar to the Applications tab, available funds are listed in a grid on the bottom tile called "Available Funds". The user can filter the list by using the Filter icon on the Available Funds tile. By default, this grid is filtered by "As Of Date" which is less than or equal to the batch creation date.
The "Funds For This Batch" grid will list any funds that were already attached to a proposal. To add funds:
Select the funds necessary for the batch by clicking on the box(s) in the far left column.
Click +Add Selected to move the indicated funds to the top tile for processing in this batch.
Fill in the Budgeted Amount column for each fund.
notice the Total Budgeted calculation updates in real-time, providing the sum of budgeted amounts for this batch.
Allocation Tab
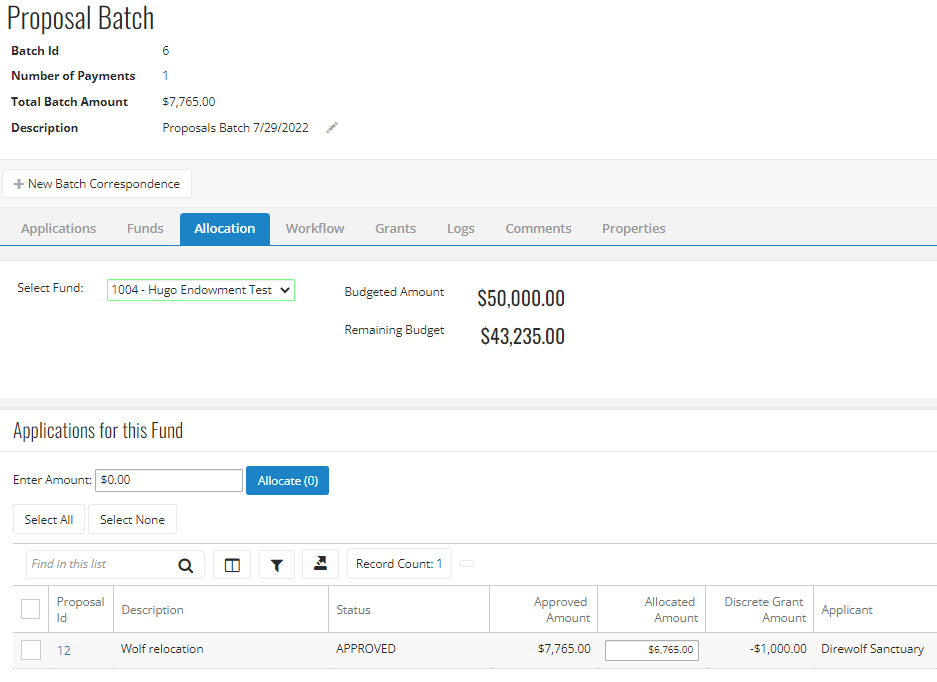
The Allocation tab will allow the user to allocate a portion of the fund's budgeted amount (from the previous tab) to one or several proposals. A proposal can have money allocated from one or more funds.
Use the drop-down menu to select a fund to work with.
The Budgeted Amount for this fund (set previously on the Funds tab) will display as a guide while allocating money to proposals.
Allocate an amount for each proposal, this can be on a one-by-one or multiple basis.
To allocate an amount one-by-one, use the Allocated Amount column to fill in the Allocated Amount field for each proposal in the grid.
To allocate money to many proposals at once, fill in the Enter Amount field on the "Applications for this Fund" tile.
Select the proposals that will get the above amount allocated to them.
use the Select All button to allocate this amount to all available proposals, to clear the check boxes click Select None.
Click Allocate(x) to assign the designated amount to the selected proposals. Notice the number on the Allocate(0) button, this number reflects how many proposals have been selected to receive this amount.
If applicable, repeat steps 1-5/6 for the remaining funds in this batch.
Notice the Discrete Amount column in the grid, when the Approved Amounthas been completely allocated, this number should be $0.00 (Allocated Amount - Approved Amount = Discrete amount)
In the example below, $6756.00 has been allocated from Hugo Endowment Fund, the Discrete Grant Amount shows there is still $1000.00 to allocate.
Using the steps above, the remaining $1000.00 will be allocated from the Wilson Endowment Fund which will update the Discrete Grant Amount to $0.00.
Workflow Tab
The Workflow tab provides the ability to update a workflow task with a completion status and add a step amount to all the proposals in the batch or a selected few.
Select some or all of the proposals to update a workflow task.
use the Select All button to process the workflow step for every available proposal in the grid, to clear the check boxes click Select None.
Click Validate Proposals, this will check the Discrete Amount for any errors, and present an error if any.
Review the Approved Amount column and make adjustments if necessary.
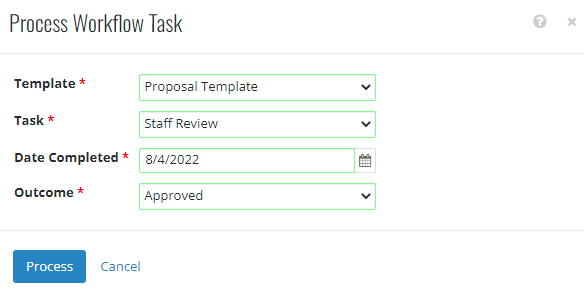
Click Process Workflow Task.
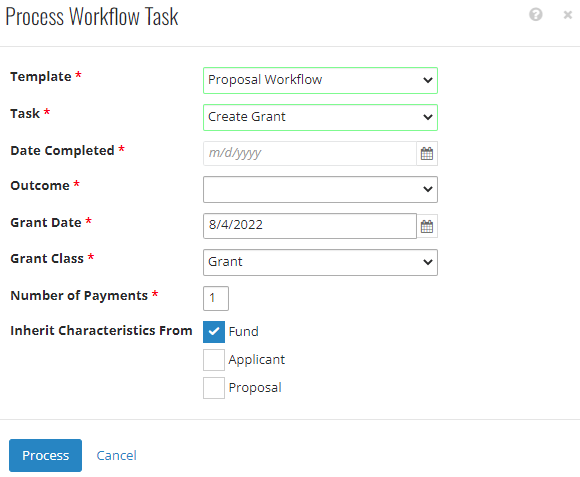
In the new modal, use the drop-down menus to select a proposal template, the task being updated, the date completed, and the outcome of this task.
Click Process. A confirmation message will show in the bottom right-hand corner. Additionally, the Logs tab will show all processing activity with a time stamp and the username of the processor.
The Create Grant Workflow task has additional fields to set.
Grant Date
Grant Class
Number of Payments
Inherit Characteristics From - these checkboxes are used to select which characteristics (if any) will copy from the source record onto the grant. For example, if the fund has a Region Served characteristic, selecting Fund will copy the characteristic from the fund onto the grant.
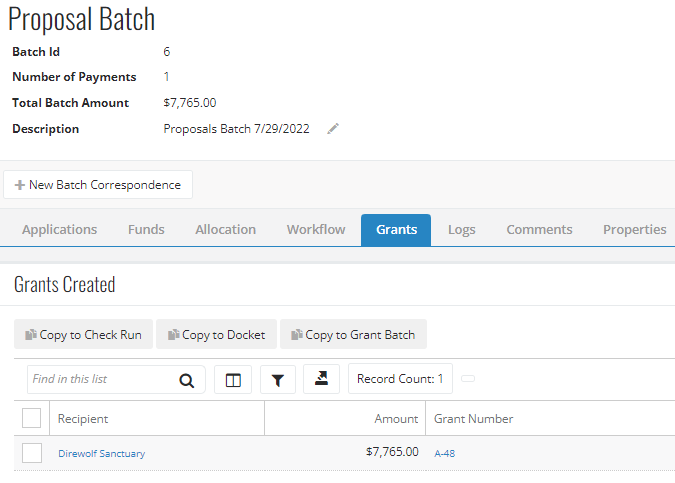
Grants Tab
The Grants Tab shows all the grants generated from this batch. The grant numbers are hyperlinks that can be opened to view the grant record.
From this screen, the user can easily take all or some of the newly created grants and begin a different processing action.
Copy to Check Run- this feature starts a new check run for the grants created from this proposal batch.
The Check Run Description defaults to: Check Run X/X/20XX from Proposal Batch #0
Copy to Docket- this feature starts a new Docket for the selected grants in the proposal batch.
The Docket Description defaults to: Docket X/X/20XX from Proposal Batch #0
Copy to Grant Batch - this feature starts a new grant batch for the grants created from this proposal batch.
The Grant Batch Description defaults to: Docket X/X/20XX from Proposal Batch #0
Comments and Properties Tabs
The Comments Tab allows the user to make any notes pertaining to this proposal batch.
Use the +Add Comment button to create a new comment,
Click the ellipsis icon on each row to edit or delete a comment. Note that users can only edit and delete their own comments. Comments entered by other users are displayed as read-only.

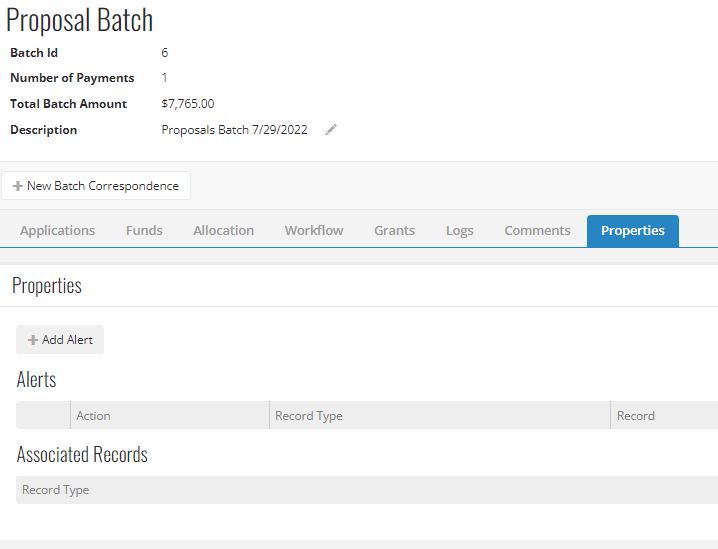
The Properties tab allows the user to create alerts for the batch and see Associated Records
Alerts - Use the +Add Alert button to create a New Alert for this batch
Click the ellipsis icon on each row to delete an Alert.
Associated Records - Relevant records for the Alerts are shown in this section
Batch Correspondence
This feature allows the user to create correspondence using information related to the proposal batch, such as transmittal letters, acknowledgment letters, etc.
Creating correspondence in a Proposal Batch will generate either a document for printing or an email. Correspondence templates designed to be used with Proposals will populate as an option to send in this batch.
Select +New Batch Correspondence
Use the processing popup screen to select “Document” or “Email” and use the drop-down list to select a correspondence template.
For emails, use the dropdown menu to select the "To" email addresses, either Applicants or Fund Advisors.
Add optional CCs and customize the email subject line if desired.
For Documents:
Download All will download all of the generated correspondence letters.
Download Selected will will download letters for only those records selected with a checkmark.
If generating Letters, now is the only time to edit these letters and see all of them at the same time.
For more information, please see Correspondence Templates.
Was this article helpful?

