- Print
- Dark
- PDF
The Profile folder allows you to save files that are related to a Profile record (for example, word processing documents, faxes, scanned documents, or images).
You can also automatically save Gift Acknowledgement letters merged into Microsoft Word in the Donor’s Profile Folder. Contact FIMS Support for more information.
1. Create a parent folder to store all of your Profile Folders. The parent folder is a standard Windows folder on your server (if networked) or workstation (if not networked).
Note: You should create the folder in or near the root of a shared directory, so all FIMS users can access it.
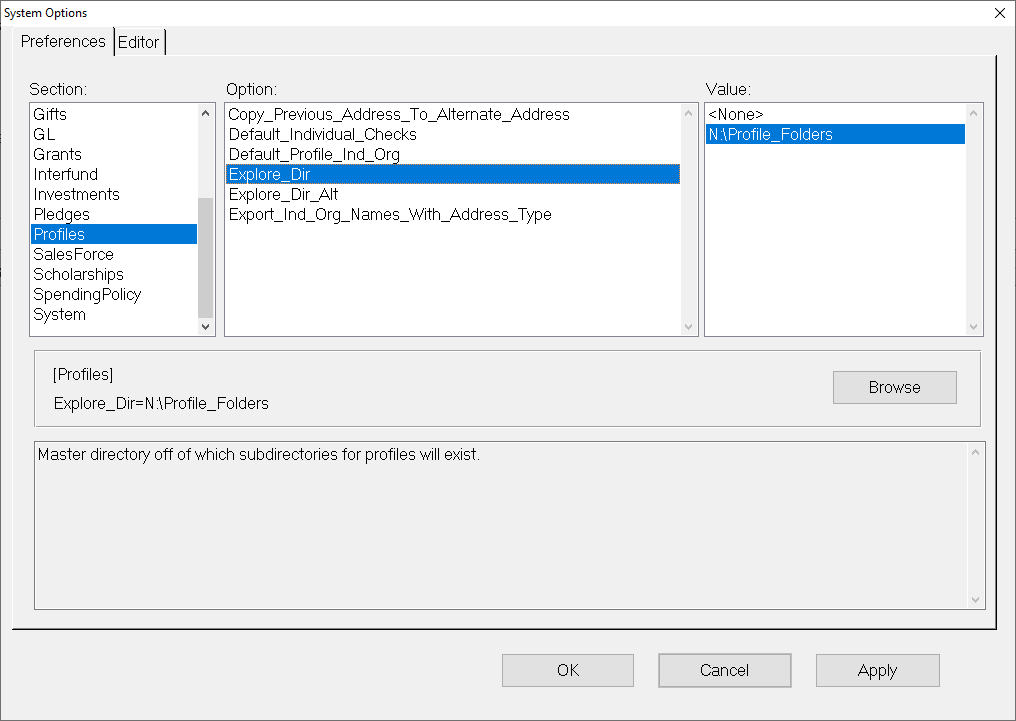
2. In FIMS, select Tools > System Utilities > System Options. The System Options window opens.
3. In the Section pane, select Profiles.
4. In the Option pane, select Explore_Dir.
5. Click the Browse button. The Browse for Folder window opens.
6. Locate the parent folder you created, and then click OK. The path and folder name will appear in the Value pane on the System Options window.
7. Select the folder name in the Value pane, and then click OK. The folder name shown below is just an example, your profile folder may be named something different.

The first time you click the Profile Folder button on the Profile Management toolbar, FIMS automatically creates the Profile Folder as a subfolder of the parent folder. The name of the folder will be a combination of the Alpha Sort Name and the Profile’s ID code (for example, Jenkins_Kathy_A_551). Each subsequent time you click the button, an explorer window will open, showing you the contents of the folder.
Link Parent and Individual Folders for Profile and Fund
Note: Do not create the Profile folders on your own through Windows. Let FIMS create and name them when you click the Profile Folder button. Then, if the Alpha Sort field is changed, the system will automatically change the name of the Profile folder for that Profile record.


