How do I upload Fund Statements to DonorCentral?
- 13 Nov 2024
- Contributors

- Print
- Dark
- PDF
How do I upload Fund Statements to DonorCentral?
- Updated on 13 Nov 2024
- Contributors
- Print
- Dark
- PDF
Article summary
Did you find this summary helpful?
Thank you for your feedback!
You can upload fund statements to DonorCentral several ways:
1. From FIMS using the Tools > System Utilities > Donor Central > Upload DC Fund Statements described in this document.
- This method allows you to upload existing PDF fund statements to DonorCentral.
- This tool is typically used if, for example, during the Create Individual Documents from a Word Merge process or External Statements, you clicked No during the process to not upload statements at that time, or, you created the statements using the Microsoft Word Macro.
2. Using the Create Individual Documents from a Mail Merge feature:
Create Individual Documents in Word from a Mail Merge
3. Using the External Statements feature with statements created in Fund Statement Designer:
4. Creating a zip file of existing PDF fund statements and upload zip file directly to DonorCentral:
- This method can be used if, for example, during the Create Individual Documents from a Word Merge Progress or the External Statements feature, you clicked No during the process to not upload statements at that time and do not want to use step #1 above, or, you created the statements using the Microsoft Word Macro and prefer to upload those statements using a zip file rather than step #1 above.
How to Create a Zip File of Fund Statements to Upload to DonorCentral
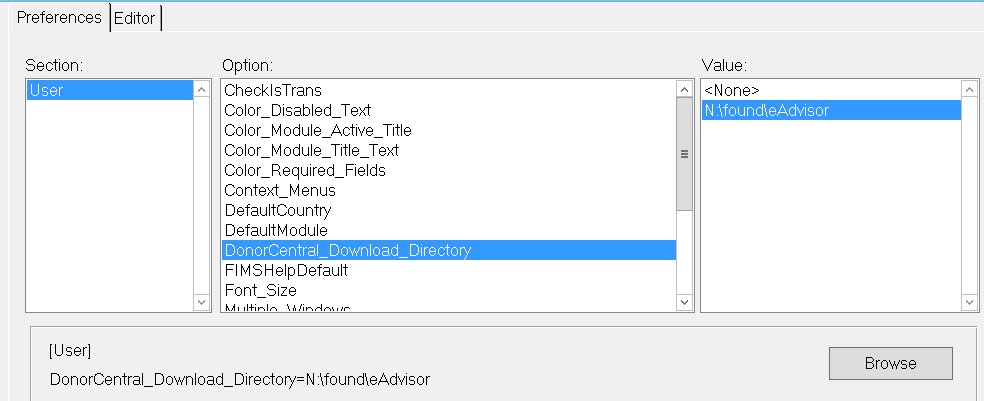
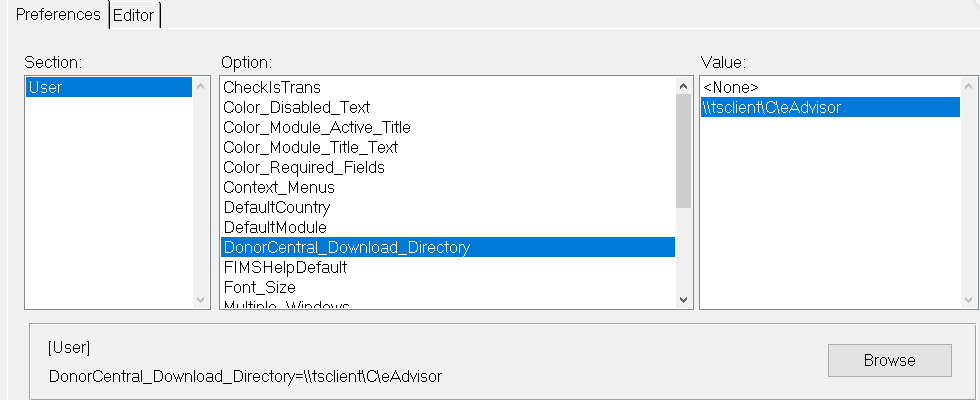
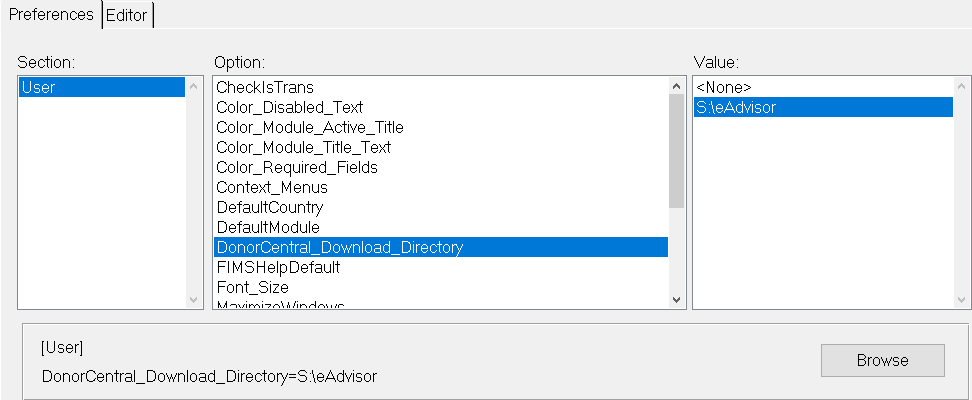
Prerequisite: You must have the DonorCentral Download Directory set for the FIMS user first. This has to be done regardless of the method that you choose to upload fund statements to DonorCentral:
- Go to Tools > User Preferences
- Select All Other Preferences and click OK.
- In the Options Section, select DonorCentral_Download_Directory.
- Click Browse, select the eAdvisor folder where statements will be created and then click Apply and Ok
a. FIMS on-premises browse to "N:\found\eAdvisor" and select that folder, then click Apply and Ok
b. FIMS on NPact Azure:
- Choose local eAdvisor folder on the user's computer. The folder that you set here has to exist on the user's local computer.
- OR choose eAdvisor folder on My Files S drive in Azure
- Click Apply and OK
Local C drive setting:
S drive setting:
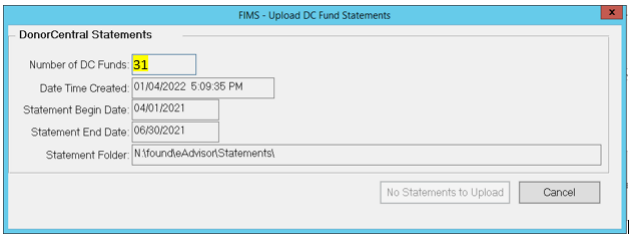
Uploading Fund Statements to DonorCentral using Tools > System Utilities > Donor Central > Upload DC Fund Statements
1. Create your Individual PDF fund statements using your preferred method.
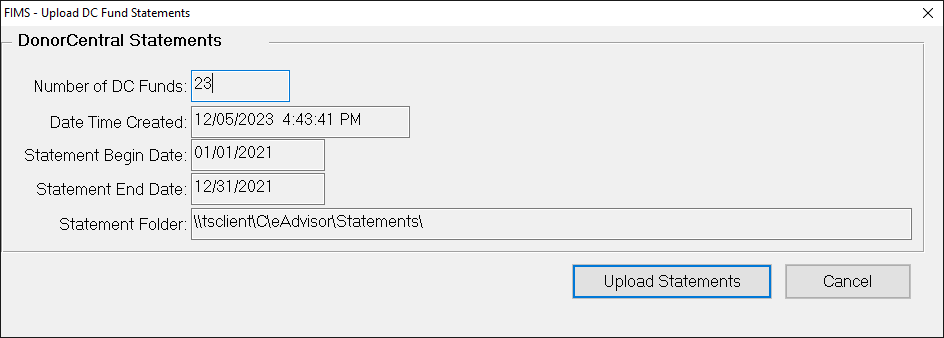
2. In FIMS, go to Tools > System Utilities > Donor Central > Upload DC Fund Statements.
2. In FIMS, go to Tools > System Utilities > Donor Central > Upload DC Fund Statements.
Note: There is an issue with slowness that can occur with uploading to DonorCentral using this function. It can take several hours for statements to appear in DonorCentral. There is a workaround described in the article below:
Uploading Statements to DonorCentral from FIMS and Saving Statements to Fund Folders is Slow
3. A window will pop up with the number to documents to be uploaded and the begin and end date
- The number of statements here comes from the number of PDFs in the eAdvisor\Statements folder. For example, if you have 23 statements in the eAdvisor\Statements folder then you will have 23 show in the screen.
- The screenshot below is an example of what the folder path would look like for a customer hosted by NPact using the local eAdvisor folder on the user's machine as set in user preferences:
Was this article helpful?

